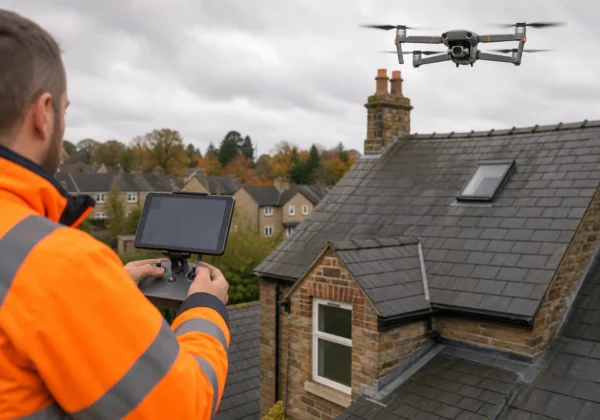
Flat roofs look simple, but hidden leaks can cost a fortune. In the next few minutes we’ll walk you through every step you need to keep a commercial flat roof in good shape.
Step 1: Establish the Roof’s Condition and Maintenance History
First, gather every document that tells you what sits on the roof , design drawings, past inspection reports, warranty paperwork and any repair invoices. Those papers show you the membrane type (EPDM, TPO, PVC) and when it was last serviced. Knowing the age helps you decide whether you’re looking at a routine check or a replacement project.
Next, talk to the facilities team. Ask about recent works: new HVAC units, roof‑top plant, or any penetrations added in the last 12 months. Those changes often create weak points that show up later as leaks.
Finally, record the current condition. Walk the perimeter, note any visible ponding, cracked seams or displaced flashing. Jot down the date, weather and any visible defects. This snapshot becomes the baseline for every future inspection.
Because only 12 % of UK flat‑roof firms list thermal‑imaging capability, a paper trail that proves you used a fully‑qualified service is a powerful risk reducer.
Step 2: Inspect the Roof Safely from Ground Level and by Drone
Before you step onto the roof, complete a CDM‑compliant risk assessment. Identify fall hazards, fragile surfaces and edge protection requirements. Use a site-specific access checklist to record the findings.
When the site is cleared, start at ground level. Use a high‑resolution camera to photograph the roof’s edges, drainage outlets and any penetrations. This visual record helps you plan the drone flight path and gives you a reference if conditions change.
Launch the drone only when wind is under 15 mph and no rain is forecast. The UAV follows a grid pattern with 70 % front and 80 % side overlap, creating a smooth orthomosaic. The drone’s thermal sensor picks up temperature differences as small as 0.05 °C, which is enough to flag wet insulation.
By the end of this step you should have a safe‑access plan, a set of ground‑level photos and a full drone flight log.
Step 3: Check Drainage, Membranes, Flashings and Roof Details
Drainage is the lifeline of a flat roof. Walk the entire perimeter, inspecting each edge metal, coping and termination detail. Look for blocked scuppers, clogged gutters or ponding that lasts more than 48 hours after rain.
Next, examine every flashing and penetration. The sealant around pipes, skylights and vents ages faster than the membrane itself , cracks or shrinkage often signal an upcoming leak.
Now turn to the field membrane. Scan for blisters, splits or surface cracking. Even a small puncture can let water reach the insulation layer, causing hidden rot.
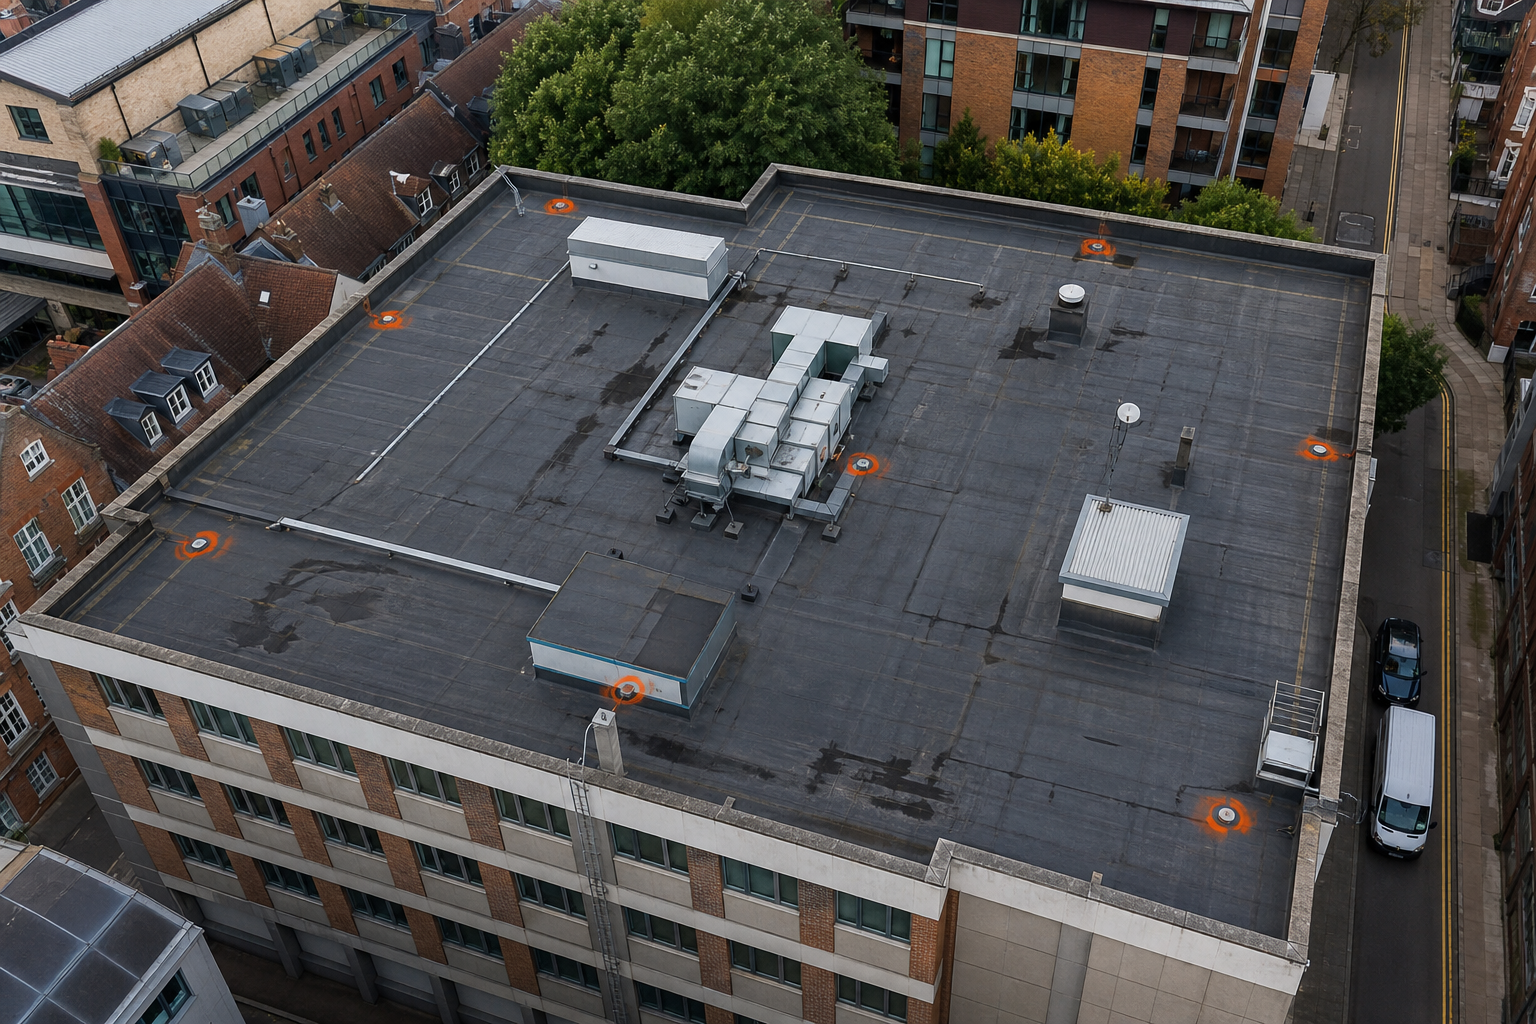
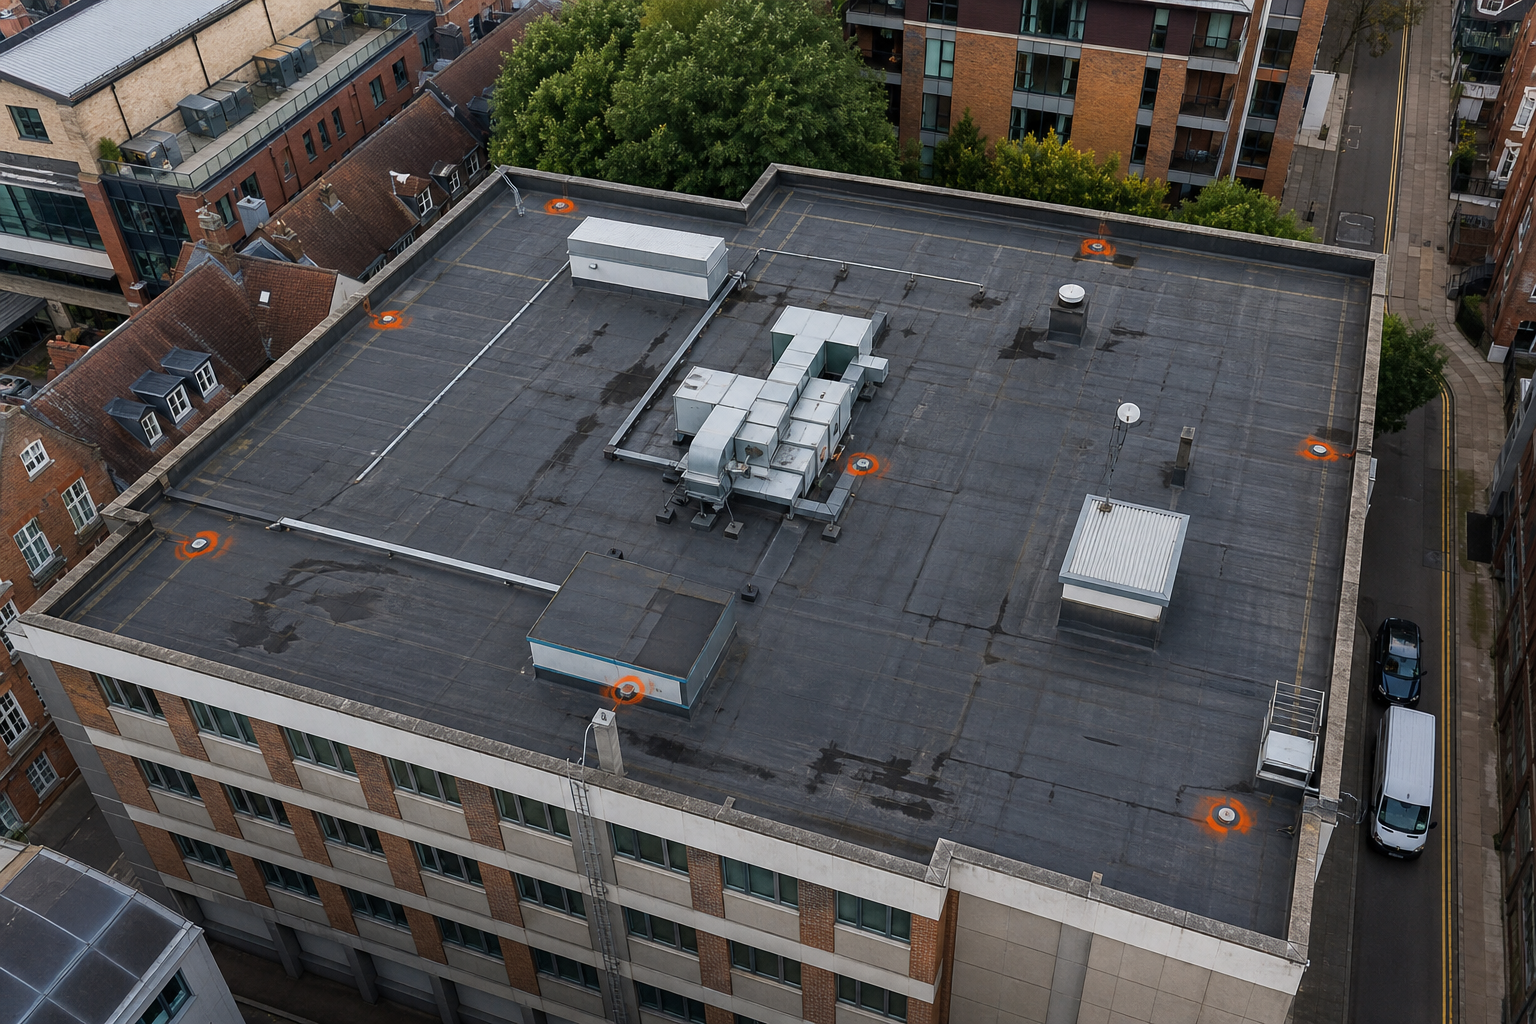
When you spot a problem, mark it with a bright spray chalk. Those marks become way‑points for the thermal analyst later.
Here’s a quick visual of what a typical drainage inspection looks like:
By now you should have a detailed map of every drainage element, membrane condition and flashing detail.
Step 4: Investigate Moisture and Heat Loss with Building Thermography
Thermal imaging for roof leaks lets you see what the naked eye can’t see. Wet insulation holds heat longer than dry material, so it shows up as a warm spot on the infrared image.
Schedule the survey for early evening or just after sunrise. The roof will have absorbed solar energy during the day, and any trapped moisture will still be warm when the surrounding surface cools.
Our drone‑mounted thermal camera captures images at 640 × 480 px resolution. That level lets you detect temperature differences as small as 0.1 °C , enough to pinpoint a leak that’s only a few centimetres wide.
After the flight, overlay the thermal layer on the 3‑D model you built earlier. Warm blobs away from drains usually mean water has soaked the insulation. Cold lines along edges often reveal air leakage or poor flashing.
Record the temperature delta for each hotspot. A difference of 3, 5 °C suggests light moisture; above 8 °C signals heavy water accumulation that needs immediate repair.
By now you should have a clear picture of where moisture is hiding and where heat is escaping.
Step 5: Record Defects, Prioritise Repairs and Schedule Follow‑Up Inspections
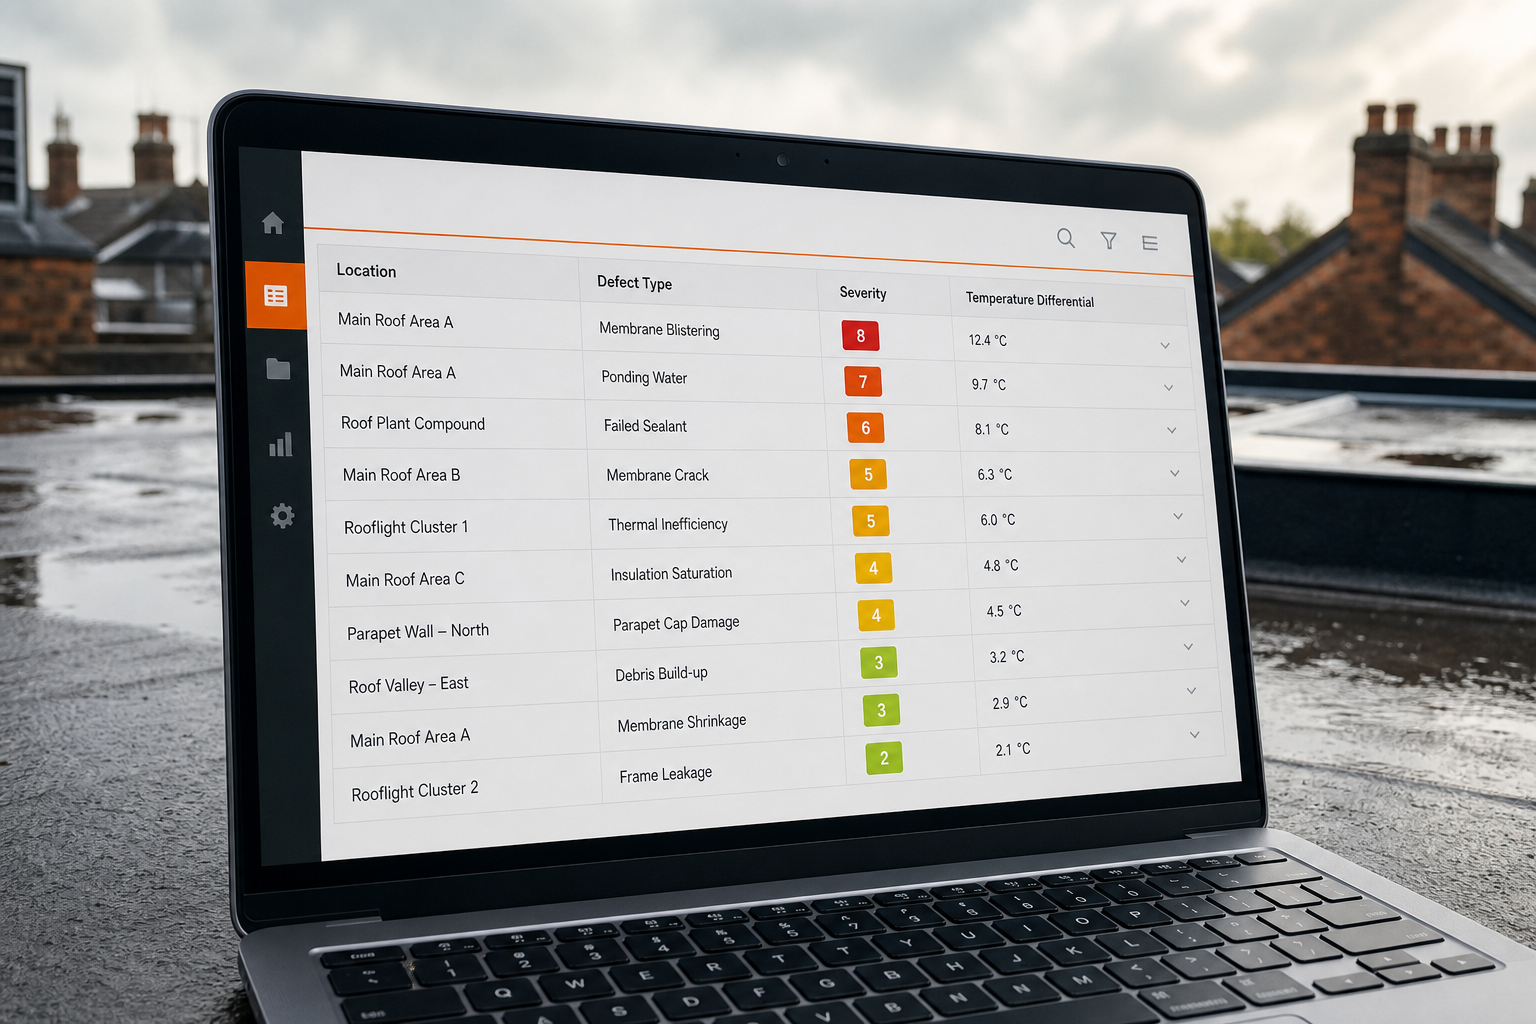
All findings belong in a structured defect register. Use a simple spreadsheet or a specialised asset‑management system to capture location, type, severity and temperature delta.
Score each defect on a 1‑10 scale. Critical items (score 8‑10) are those that risk water ingress or structural damage; moderate items (4‑7) affect energy performance; minor items (1‑3) are cosmetic.
Prioritise repairs by combining the defect score with business impact , a leak above a critical plant room gets higher priority than a small blister on an unused roof section.
Plan a remediation timetable. Immediate fixes (within 30 days) for high‑risk leaks, short‑term actions (1‑3 months) for moderate heat‑loss areas, and long‑term maintenance (6‑12 months) for minor issues.
Schedule the next full inspection for 12‑18 months after the current one, or sooner if the weather forecast predicts heavy rainfall.
By now you have a complete, actionable repair plan and a calendar for future checks.
FAQ
What is the first thing to do before a flat roof inspection?
The first step is to collect all existing documentation , drawings, past reports and warranty papers , so you know the roof’s construction and history.
How often should a commercial flat roof be inspected?
A full drone‑based inspection every 1‑3 years is recommended, plus a visual walk‑over after any major storm or repair.
Can I inspect a flat roof myself without a drone?
You can perform a basic walk‑around, but a drone gives you safe access, high‑resolution mapping and thermal data that a manual check can’t match.
What temperature difference indicates moisture in a thermal image?
A delta of 3‑5 °C usually points to light moisture; anything above 8 °C suggests a significant water pocket that needs repair.
Do I need a specialist to interpret the thermal data?
Yes. Certified thermographers understand emissivity settings, calibrations and how to translate colour bands into actionable findings.
Conclusion
We recommend starting with Visual Perspectives Limited’s managed drone and thermal survey , it covers every step from documentation to defect prioritisation. Once the report is in hand, schedule the highest‑risk repairs within a month and set a calendar for the next full inspection.