Flat roofs let water linger, and a hidden leak can damage a building fast. Spot the problem early and you’ll save money, avoid disruption, and keep the structure safe. Below is a hands‑on, step‑by‑step process for flat roof leak detection that works for commercial estates and public‑sector sites.
Step 1: Record the Symptoms and Make the Area Safe
First, note every sign of moisture inside the building. Look for yellow or brown stains on ceiling tiles, bubbling paint, or mould patches. A sudden rise in heating or cooling bills can also hint at hidden wet insulation. Write down the location, size and colour of each stain; take photos while you’re at it.
Next, make the area safe. If water has reached electrical fittings, switch off the relevant circuit at the consumer unit. Keep people away from any wet light fittings or outlets. A brief safety check reduces the risk of shock and protects your evidence.
Why record now? Water can travel up to 20 feet horizontally under a flat membrane, so a stain on the ceiling may not line up with the roof defect. Documenting the symptom trail helps you back‑track later.
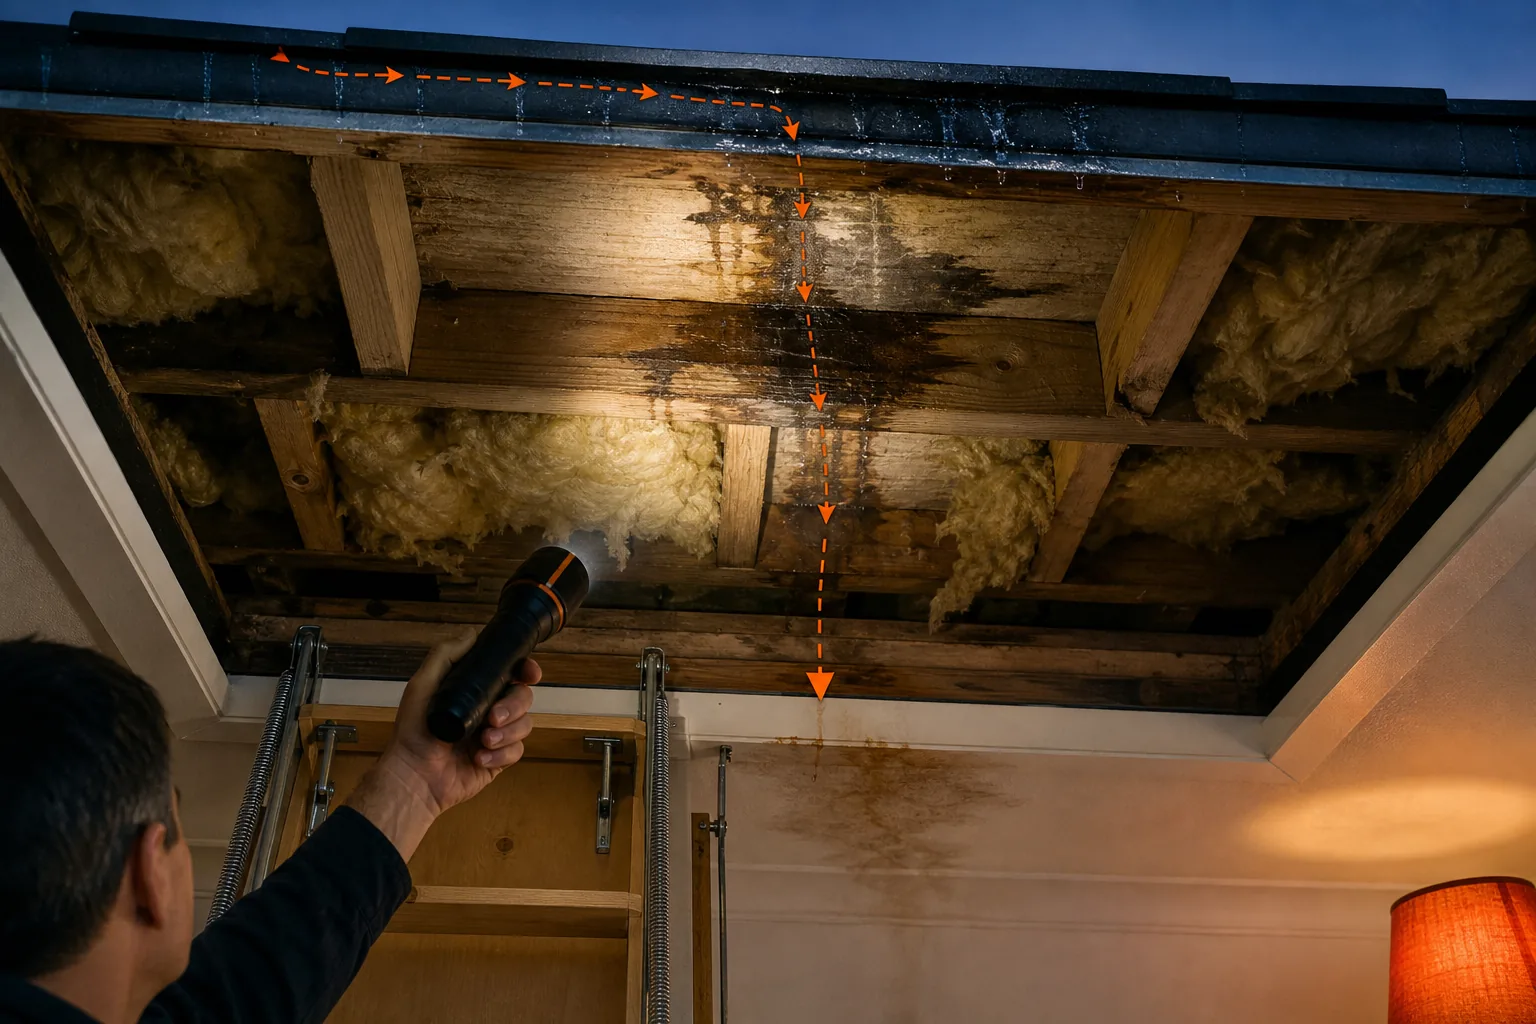
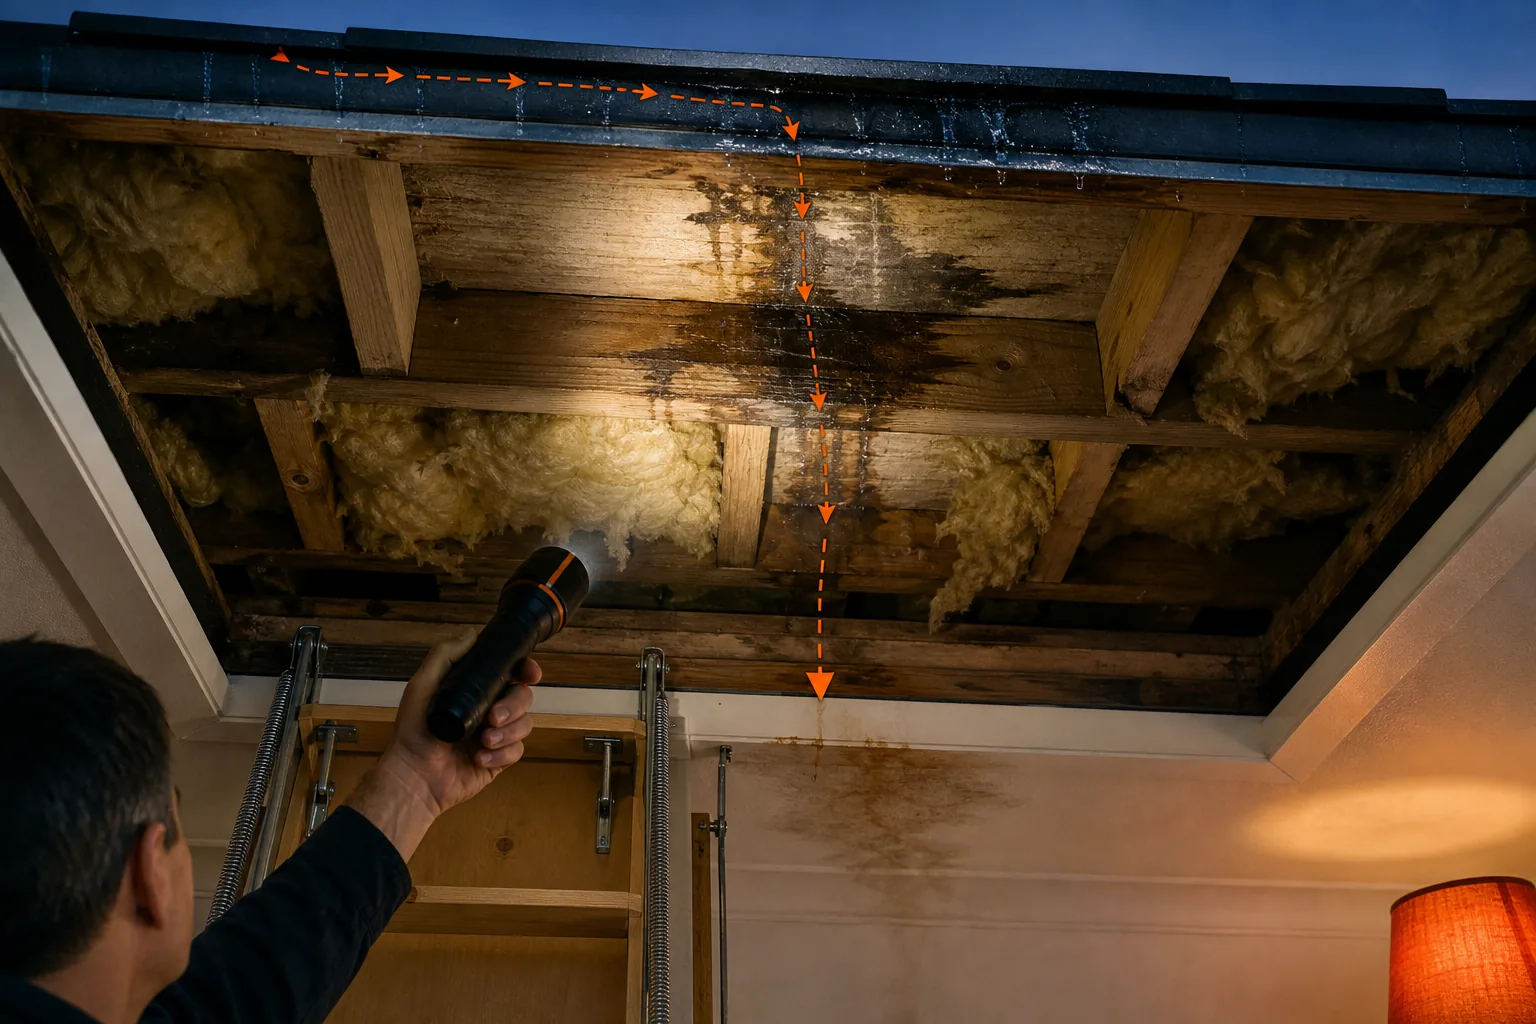
We recommend a quick visual walk‑over of the roof interior with a torch. Spot fresh damp timber , it looks darker than the surrounding wood , and note any sagging plaster that could collapse under weight.
For a deeper look at interpreting thermal images of flat roofs, see How to Interpret Thermal Images for Flat Roof Leaks. This ties the interior signs to what you’ll see from above.
Step 2: Trace Water Ingress from the Interior
Start where the stain appears and think backwards. Water usually enters through a roof opening , a cracked tile, a failed flashing or a loose seal , then travels along the underlay, timber and insulation before it drips onto the ceiling.
Measure the distance from the centre of the stain to two fixed points in the room. Those measurements let you map a rough area on the roof plan. Remember, the darkest part of a stain isn’t always directly under the defect.
Use a flashlight in the loft or attic. Look for fresh damp timber, which will appear darker than dry wood. If you see multiple wet spots, the highest one is often closer to the entry point because water flows downhill.
When you can, inspect the roof during a rain event. A safe, controlled test with a garden hose can reveal the path of water through the membrane.
Electrical safety is critical. If water has reached wiring, have a qualified electrician isolate the circuit before you continue.
Once you’ve marked the likely roof zone, you have a target area for the aerial survey.
Step 3: Inspect the Roof Covering, Outlets and Penetrations
Now it’s time to look at the roof itself. Walk the roof surface, or use a drone if the building is large or the roof is hard to reach. Check the membrane for blisters, cracks or tears. Look at all flashings , around HVAC units, vents, skylights and pipe penetrations , and note any rust, lifted sections or missing sealant.
Pay special attention to drainage outlets. Ponding water that stays more than 48 hours after rain signals a blockage or a low spot that can force water into the membrane.
When you spot a potential defect, record its GPS coordinates or sketch its position on the roof plan. This will help you later when you overlay thermal data.
Drone footage gives you a bird’s‑eye view without climbing onto the roof. It also lets you capture high‑resolution RGB images that you can stitch into an orthomosaic for later analysis.
For a full commercial‑roof workflow, read Commercial Roof Leak Detection: A Step‑by‑Step Guide. The guide shows how we pair drone surveys with on‑site checks.
Step 4: Use Moisture Meters and Thermal Imaging to Locate Hidden Moisture
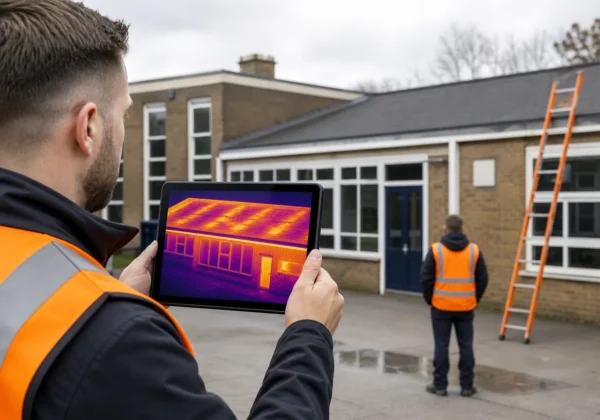
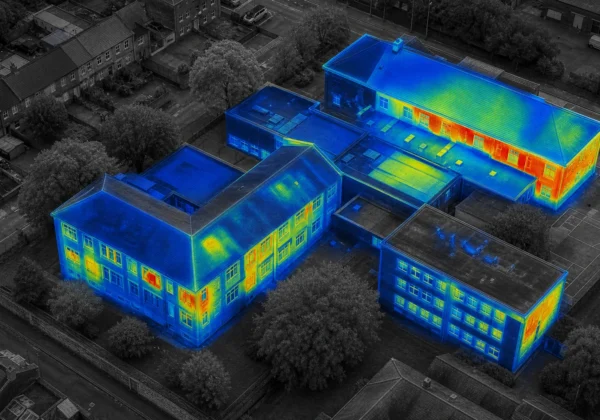
Thermal imaging spots temperature differences that indicate wet insulation or membrane saturation. Launch the drone just after sunset; the roof cools quickly, but trapped water stays warm longer, creating a clear contrast.
Set the camera emissivity to 0.95, the typical value for roofing membranes. Fly at a suitable altitude with sufficient front and side overlap. The software will stitch a smooth thermal orthomosaic.
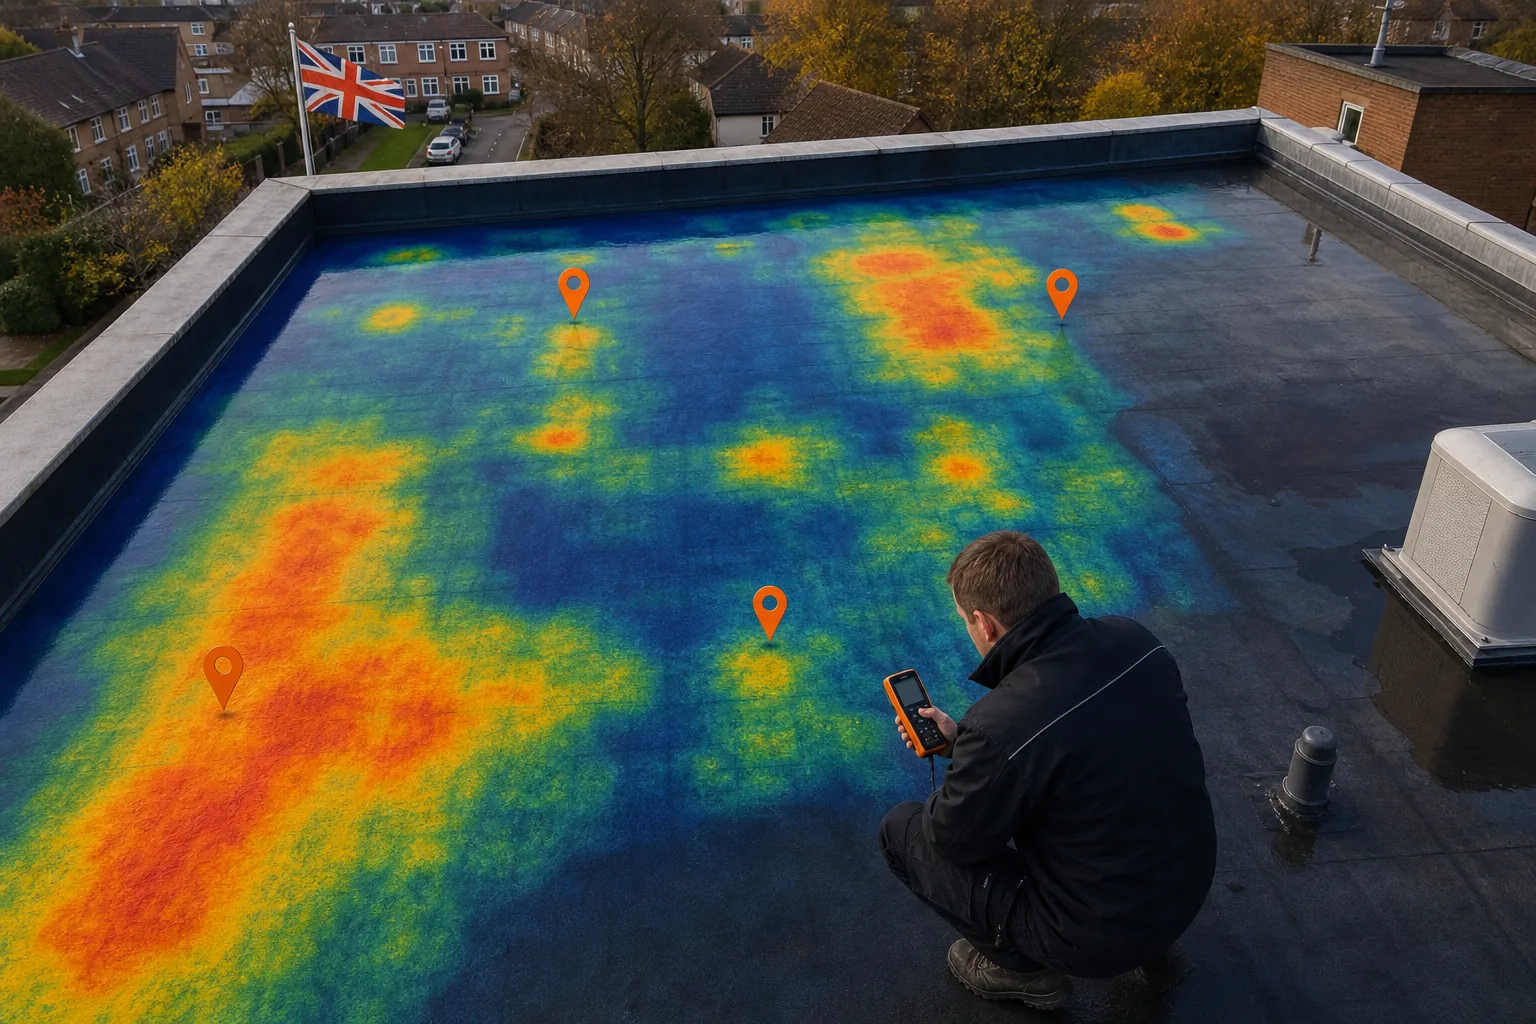
Look for warm blobs that break the uniform colour gradient of the roof. A difference of 3 °C to 5 °C from a dry reference area usually signals moisture. Mark each hotspot with its GPS location.
Next, use a suitable moisture-detection method at each hotspot. Readings above 20 % moisture in timber or above 5 % in plaster confirm water presence.
Combine the thermal map with the point‑meter data in a GIS‑ready layer. The overlapping data gives you a high‑confidence leak zone.
Flat roofs can be especially prone to water pooling, making thermal surveys a vital first step.
Step 5: Confirm the Source and Commission Specialist Evidence Where Needed
Now you have a list of suspect zones. The final step is to verify the exact breach. For high‑value public‑sector assets, consider a specialist leak-detection test such as a specialist leak-detection method. A specialist test can help identify tiny breaches that visual inspection may miss.
If specialist testing isn’t required, a targeted core sample can still give you concrete evidence. Drill a small hole at the hotspot, extract a piece of membrane and test it in a lab for moisture content and material degradation.
Compile all findings into an IEC 62446‑compliant report. The report should include the orthomosaic, GPS‑tagged hotspots, moisture‑meter readings, and any specialist test results. This evidence package satisfies insurers and building‑control officers.
Our own surveys follow this exact workflow, delivering a clear, actionable report that lets facilities managers schedule repairs with confidence.
Once the source is confirmed, you can move straight to remediation , replace the failed flashing, reseal the membrane or apply a GRP overlay where needed.
FAQ: Flat Roof Leak Detection
How do I know if a stain is from a roof leak?
The stain is a sign of water ingress if it appears as a yellow, brown or rust‑coloured patch and is accompanied by a fresh, damp feel. A sudden increase in energy bills also points to hidden moisture.
Can I detect a leak without a drone?
Yes, a hand‑held thermal camera and a moisture meter can locate hidden moisture, but drones give faster, safer coverage of large roofs and produce a 3‑D model for precise reporting.
What temperature difference indicates moisture on a thermal image?
A warm area that is at least 3 °C hotter than a dry reference spot usually signals moisture; larger deltas (5 °C‑8 °C) suggest more severe water accumulation.
Do I need to shut off the building’s heating during a survey?
Turning off heating for a few hours helps create a temperature gradient, but it’s not mandatory if you schedule the thermal run after sunset when the roof naturally cools.
Is IEC 62446 certification necessary?
For public‑sector estates and insurance claims, IEC 62446 compliance provides a recognised standard for thermographic evidence, making the report legally strong.
How often should flat roofs be inspected?
Schedule a full inspection at least twice a year , after the rainy season and before the heating season , to catch ponding water and membrane wear early.
Flat roof leak detection is a systematic process, but the right partner makes it painless. We recommend starting with a drone‑based thermal survey to pinpoint hidden moisture quickly and safely.
Contact Visual Perspectives Limited to arrange a certified inspection and get a detailed, IEC 62446‑compliant report that guides your repair plan.