
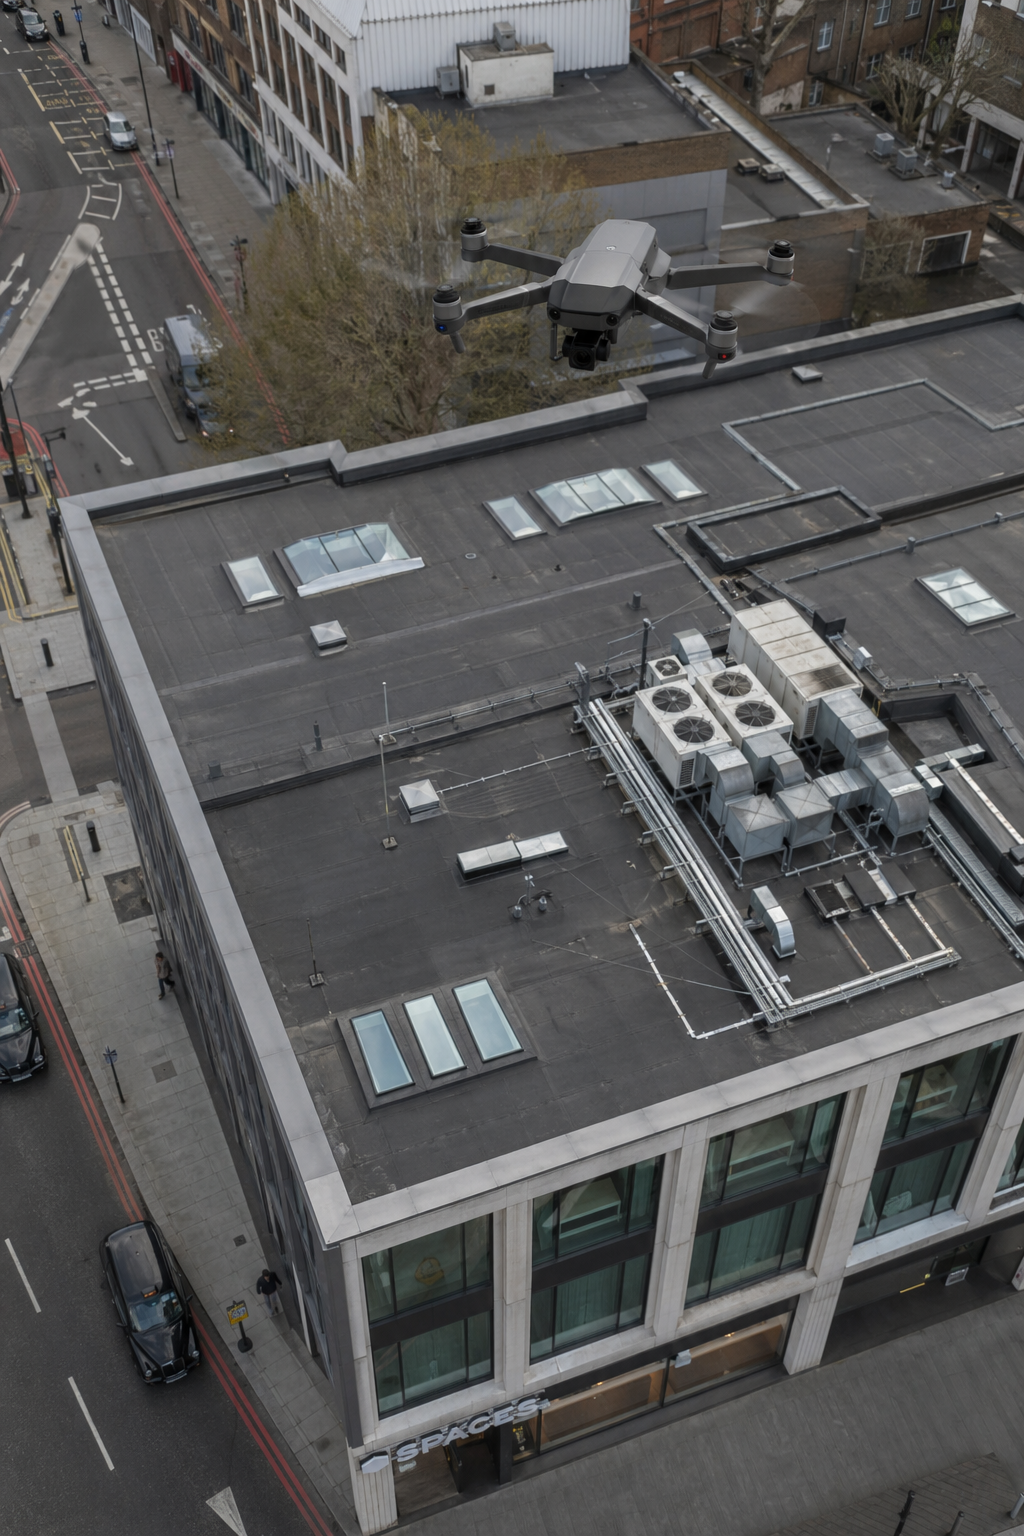
Imagine walking away from ladders and getting a full roof view in minutes , that’s what drones do for commercial building inspections. In this guide, we’ll show you how drone roof inspections work, why they’re safer and cheaper, and how you can get started. We’ll cover everything from choosing the right drone to understanding thermal imaging and UK regulations. By the end, you’ll know exactly how to use a roof inspection drone for your next commercial survey.
Table of Contents
- Why Use Drones for Commercial Roof Inspections?
- Choosing the Right Drone for Commercial Roof Surveys
- Flight Planning and UK Regulatory Compliance
- Data Capture, Processing, and Software Comparison
- Thermal Imaging for Hidden Defect Detection
- Cost‑Benefit Analysis: ROI of Drone Roof Inspections
- Frequently Asked Questions
- Conclusion
Why Use Drones for Commercial Roof Inspections?
Traditional roof inspections mean scaffolding, cherry pickers, or rope access. They’re slow, expensive, and risky. Falls from height remain the leading cause of death in the construction industry , in the UK alone, 29 people died from falls in 2019 . Drones remove that risk entirely.
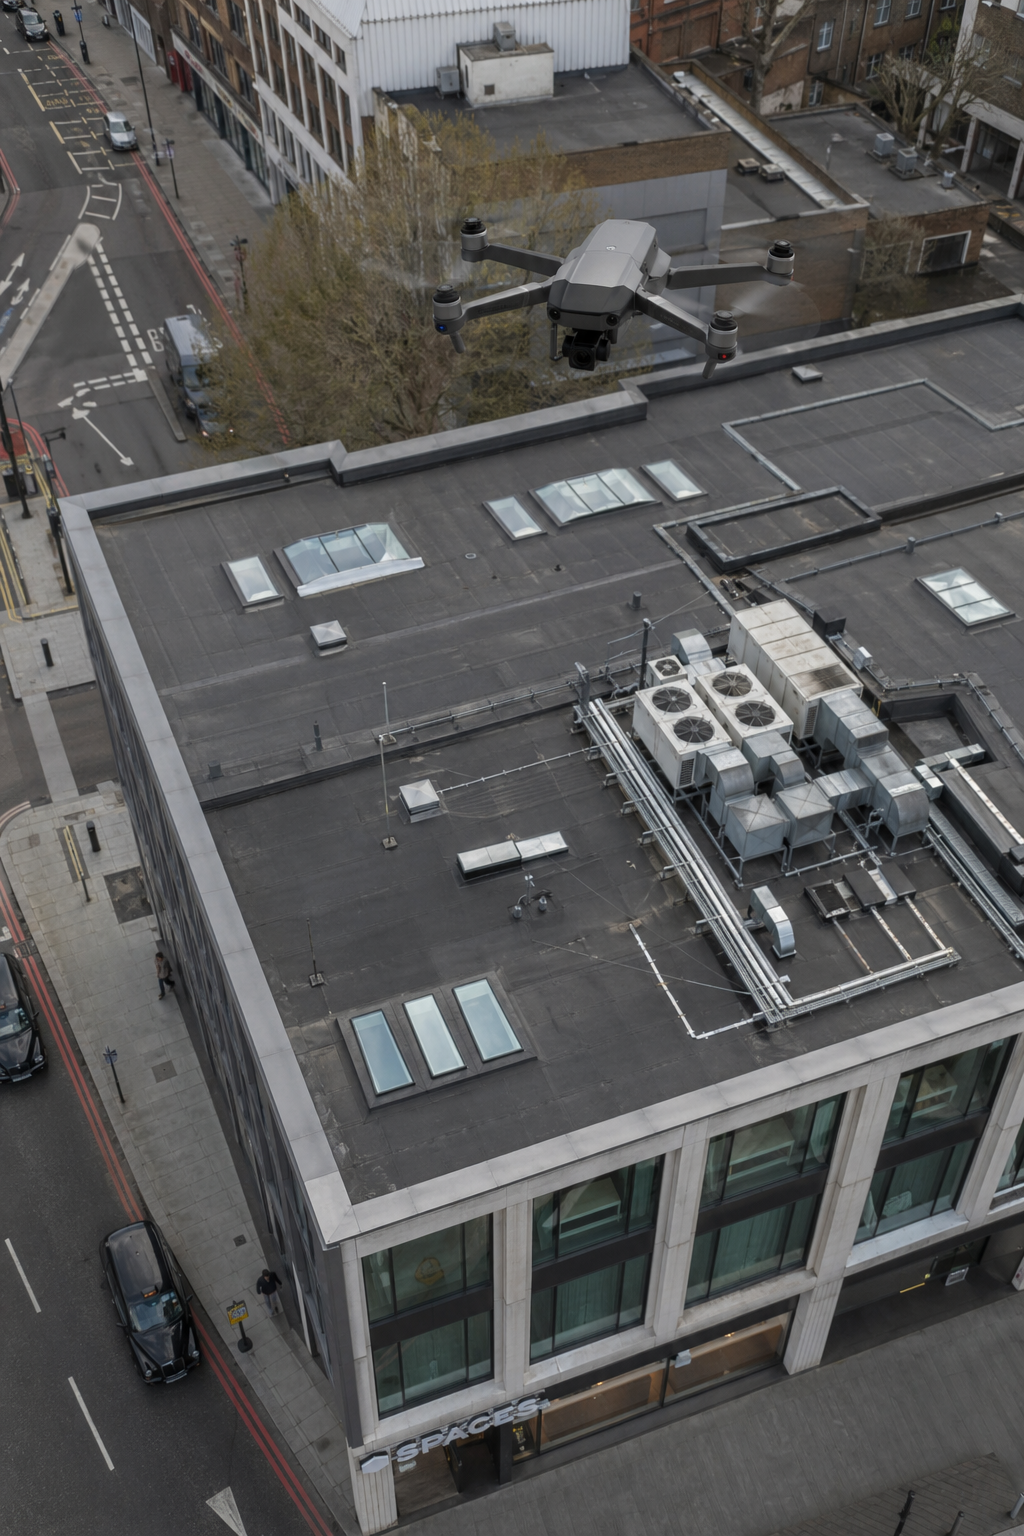
A roof inspection drone captures high‑resolution images and video from the ground. No one has to climb onto the roof. The pilot stays on solid ground. That alone makes drone inspections safer.
But safety isn’t the only benefit. Drones are faster. A commercial roof that would take half a day to inspect with scaffolding can be flown in under an hour. That speed cuts costs dramatically. For a typical 15‑story commercial building, a drone inspection costs between £1200 and £2,000, while scaffolding inspection runs £25,000 to £75,000 or more, as noted by Aerially.AI’s comparison. The saving is huge.
Drones also provide better data. They capture 90 to 100 percent of the roof surface in a single flight. Scaffolding only covers 10 to 15 percent per setup. You get a complete picture , every corner, every flashing, every gutter. And that data is permanent. You can compare it year after year to spot changes.
Plus, drones cause zero disruption. Your staff keep working. There are no noisy scaffold crews blocking entrances or car parks. For commercial properties, that’s a big advantage.
29deaths from falls in UK construction in 2019 , drone inspections eliminate that risk.
Bottom line:Drones make roof inspections safer, cheaper, faster, and more thorough than traditional methods.
Choosing the Right Drone for Commercial Roof Surveys
 Regenerate
Picking the right roof inspection drone depends on three things: camera quality, flight time, and software compatibility. For commercial work, you need more than a toy drone. Here are the key factors.
Camera resolution and type
You need at least 20 megapixels for stills and 4K for video. Thermal capability is a must for detecting moisture and insulation gaps. The DJI Mavic 3 Thermal series, for example, offers a 20MP wide‑angle camera and a 640×512 radiometric thermal sensor. That combination lets you see both visual and thermal data side by side.
Pro Tip: Look for drones that support both RGB and thermal overlays in real time. This allows you to identify problems immediately and correlate them with visual images.
Flight time and battery
Commercial roofs can be huge. A drone with at least 30 minutes flight time is essential. The Mavic 3 Enterprise series gives about 45 minutes per battery. For very large roofs, plan for multiple batteries. Some operators use battery‑swap strategies to keep the drone flying continuously.
Payload and zoom
A 56x hybrid zoom (like on the Mavic 3 Thermal) lets you inspect details like cracks or damaged flashing from a safe distance. You don’t have to fly close to obstacles. That reduces collision risk and improves image clarity.
Software integration
The drone you choose must work with photogrammetry software like Pix4D or DJI Terra. These tools stitch images into orthomosaics and 3D models. That’s how you get measurable, actionable data. For UK regulations, the drone should be below 25kg and CAA compliant. Most commercial operators fly drones under 2kg to avoid stricter rules.
Bottom line:Choose a drone with high‑resolution RGB and thermal cameras, long flight time, and compatibility with mapping software.
Flight Planning and UK Regulatory Compliance
Flying a roof inspection drone in the UK isn’t just about pressing a button. You need to follow the Civil Aviation Authority (CAA) rules. Here’s what you must know.
First, registration. If your drone weighs 250g or more, you need an Operator ID and a Flyer ID. The Operator ID is for the person or company responsible for the drone. The Flyer ID is for the person flying it. Both require passing the CAA’s theory test. The CAA’s Drone Code explains everything step by step.
Second, operational categories. For commercial roof inspections, you’ll likely fly in the Open Category A3. That means you must stay at least 150 metres from residential, commercial, industrial, and recreational areas. That’s a challenge for many commercial buildings. If the roof is in a city centre, you may need permission from the CAA to fly closer. Some operators hold a Permission for Commercial Operations (PfCO) or use the Specific Category with an Operational Authorisation.
Key Takeaway: Always hire a CAA‑approved operator with appropriate insurance for commercial drone inspections , they handle the red tape so you don’t have to.
Flight planning parameters
Plan your flight around the sun. For thermal inspections, the ideal time is about one hour after sunset when the roof has cooled but trapped moisture retains heat. If you fly at night, you need a night waiver from the CAA. Alternatively, fly when the roof is in shadow from adjacent buildings.
Set your altitude between 30 and 60 metres for detailed images. Keep the camera angle between 70 and 90 degrees to avoid distortion. Use a programmed grid flight path with 70‑80 percent front and side overlap. That ensures the photogrammetry software can stitch the images accurately.
Always have a visual observer. On large flat roofs, the drone can easily fly out of line of sight. The observer tracks the drone and warns of obstacles like trees, power lines, or cranes.
Bottom line:UK drone flights require CAA registration, operational authorisation, and careful flight planning , especially for thermal and city centre work.
Data Capture, Processing, and Software Comparison
 Regenerate
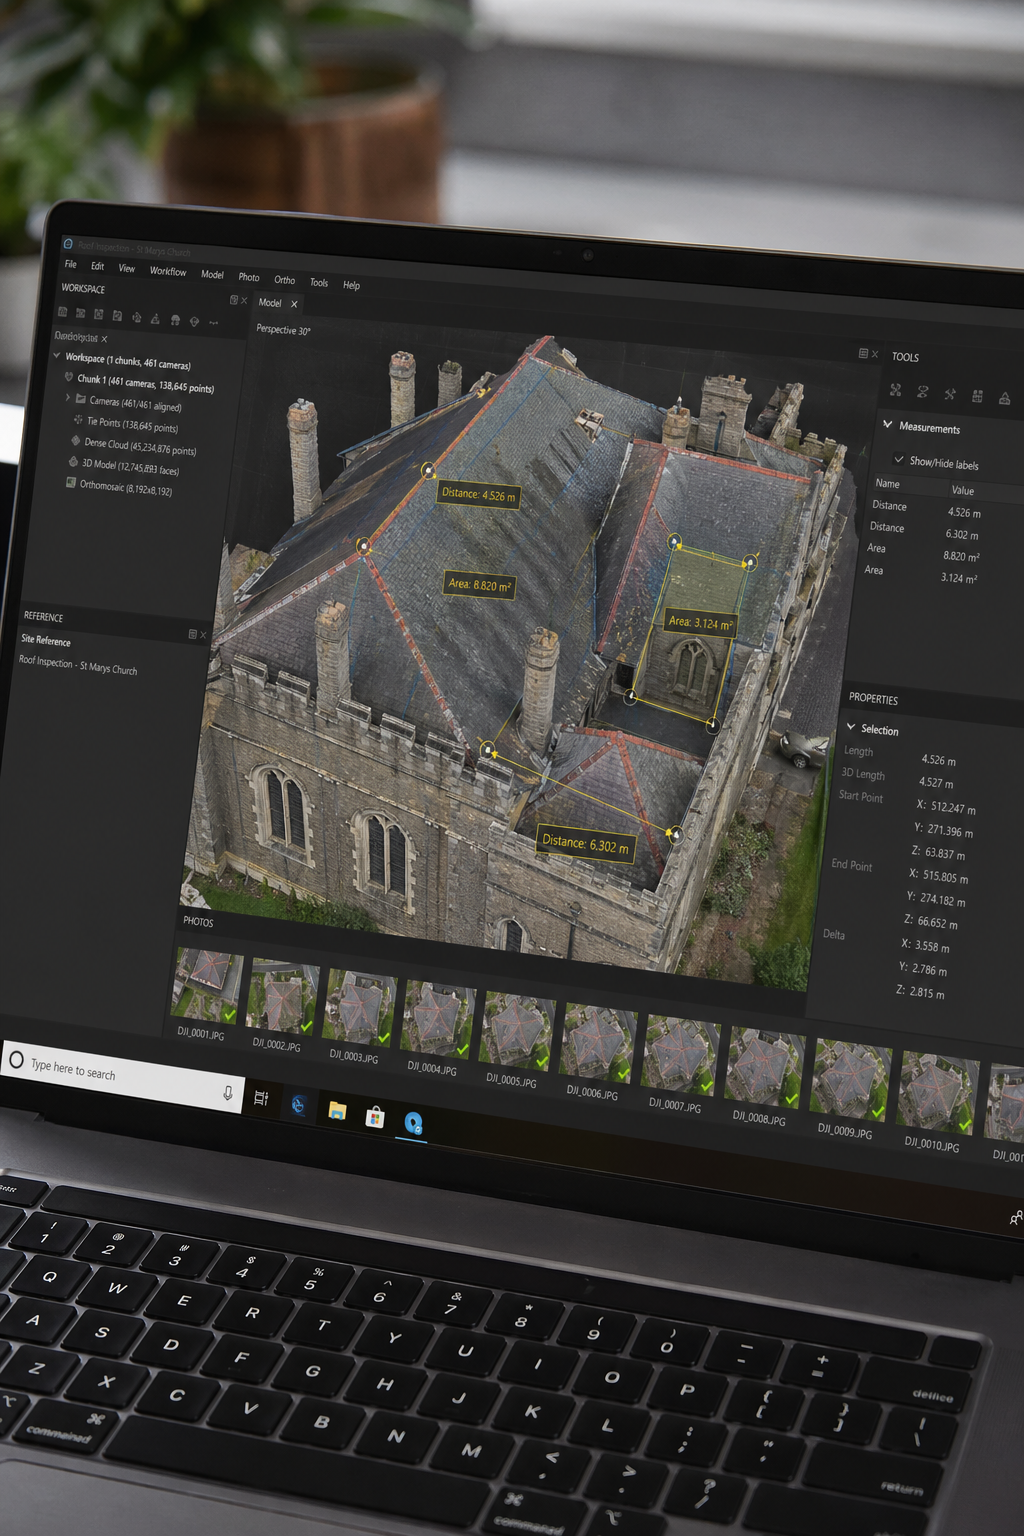
Capturing the data is only half the job. The real value comes from processing that data into actionable reports. Let’s look at the workflow and software options.
Capture workflow
- Pre‑flight check:Check the drone, batteries, weather, and airspace restrictions.
- Set up the mission:Use an app like DroneDeploy or DJI Pilot 2 to plan a grid path with proper overlap.
- Fly the mission:The drone flies autonomously. The pilot monitors and the visual observer watches for hazards.
- Land and download:Transfer images to your computer or cloud service.
Software comparison
There are several software platforms for processing roof inspection drone data. Here’s a comparison of the most common ones:
| Software | Processing Speed | Accuracy | Output Format | Best For |
| Pix4D | 15–30 min per roof | 1–3 cm | Orthomosaic, 3D mesh, point cloud | Large commercial roofs, solar surveys |
| DJI Terra | 10–20 min per roof | 2–5 cm | Orthomosaic, 3D model, LAS | Quick turnarounds, DJI drone users |
| DroneDeploy | 20–40 min per roof | 3–10 cm | Orthomosaic, 3D model, PDF report | Beginner‑friendly, real‑estate reports |
| SkyeBrowse | 2–5 min per roof | 2–6 cm | 3D mesh, GLB, GeoTIFF | Fast inspections, insurance claims |
Pro Tip: For commercial roof inspections, choose software that exports to BIM or CAD formats. This allows architects and engineers to integrate the data directly into building models.
Processing steps
- Import images:Load the images into the software.
- Align and stitch:The software identifies common points and stitches images into an orthomosaic.
- Generate 3D model:Create a digital twin of the roof.
- Take measurements:Measure areas, distances, and slopes.
- Add annotations:Mark defects like cracks, ponding water, or thermal anomalies.
- Export report:Save as PDF, shareable link, or CAD file.
For thermal data, radiometric images must be processed using software like FLIR Tools or Thermal Studio to extract temperature values and create thermal orthomosaics. This is critical for identifying moisture and insulation issues.
Bottom line:The right software turns raw drone images into accurate, actionable 3D models and reports , choose based on speed, accuracy, and integration needs.
Thermal Imaging for Hidden Defect Detection
Thermal imaging is the superpower of a roof inspection drone. It reveals problems the naked eye can’t see: trapped moisture, missing insulation, ponding water, and even small air leaks. Here’s how it works.
Drones with radiometric thermal cameras capture the temperature of every point on the roof. Moisture holds heat longer than dry material. During the day, the sun heats the roof. After sunset, the roof cools down , but areas with trapped moisture stay warm. That temperature difference shows up clearly on the thermal image.
For commercial flat roofs, moisture underneath the membrane is a common problem. It can lead to rot, mould, and structural damage. A drone thermal survey can find these hidden wet spots long before they cause a leak. According to BDG’s drone inspection guide, thermal imaging uses a FLIR Zenmuse XT 640×512 radiometric camera to detect moisture after dark.
“Thermal imaging lets you see what the naked eye can’t , moisture, insulation gaps, and electrical faults , all from the ground.”
Common defects found with thermal imaging
- Moisture under roofing membranes, appears as warm spots on a cool roof.
- Missing or wet insulation, shows as uneven temperature patterns.
- Blocked gutters and drains, water accumulation is visible.
- Solar panel hot spots, faulty cells or bypass diodes.
- Air leaks around roof penetrations, temperature differences at edges.
Thermal inspections are especially useful for solar panels on commercial roofs. A drone can fly over the array and detect failing modules quickly. For that, we follow IEC 62446‑3 standards to ensure the data is reliable and accepted by insurers and warranty providers.
Key Takeaway: Thermal imaging from a drone finds hidden roof defects early, saving thousands in repair costs and preventing major damage.
Bottom line:Thermal drone surveys detect moisture, insulation failures, and electrical faults that visual inspections miss , critical for proactive maintenance.
Cost‑Benefit Analysis: ROI of Drone Roof Inspections
Is investing in a roof inspection drone worth it? For commercial building owners, the numbers are clear. Let’s break down the costs and savings.
What you pay
A professional drone inspection for a commercial roof costs between £150 and £400 for a typical building, according to HeliDrone Surveys’ UK pricing guide. Larger or complex roofs may cost more. If you hire a service like Visual Perspectives, you get a complete package: flight, processing, and a detailed report.
What you save
- Scaffolding costs:£25,000+ saved per inspection.
- Labour costs:One hour versus multiple days.
- Downtime:No business disruption , zero lost productivity.
- Early defect detection:Fix small problems before they become expensive leaks or structural failures.
A single drone inspection can pay for itself many times over by catching a leak early. For example, if a small tear in a membrane goes unnoticed for a year, water can cause rotting, mould, and even ceiling damage. Repair costs skyrocket. A drone inspection costs a fraction of that.
90%cost reduction compared to scaffolding inspection for commercial buildings.
ROI calculation example
Imagine a 50,000 sq ft flat roof. Scaffolding inspection: £30,000 and two weeks. Drone inspection: £500 and 4 hours. If the drone finds a 10‑metre tear before it leaks, that saves £15,000 in repairs. The ROI is 3,000%.
Bottom line:Drone roof inspections offer massive cost savings through faster turnaround, reduced risk, and early defect detection , delivering strong ROI in months.
Frequently Asked Questions
What is the current CAA regulation for commercial drone roof inspections in 2026?
From 2026, new drones sold must have a UK class mark (UK0 to UK6). Commercial inspections typically fall under the Open Category A3 or Specific Category. You need both an Operator ID and a Flyer ID. The drone must weigh under 25kg. For flights near buildings, you may need an Operational Authorisation from the CAA. Always hire a CAA‑approved operator with insurance.
How long does a drone roof inspection take for a typical commercial building?
For a single 50,000 sq ft flat roof, flight time is about 15 to 30 minutes. Total inspection including setup and processing takes 2 to 4 hours. Compare that to scaffolding inspection, which can take 1 to 2 weeks. Drone inspections are much faster, making them ideal for urgent post‑storm assessments or routine quarterly checks.
Can drone roof inspections detect leaks without physical contact?
Yes, especially when combined with thermal imaging. A drone with a radiometric thermal camera can detect moisture trapped under roofing membranes. The moisture retains heat longer than dry areas, showing up as warm spots on the thermal image. This allows inspectors to pinpoint leaks without stepping on the roof, and the data can be used to plan targeted repairs.
What type of report do you get after a drone roof inspection?
You typically receive a detailed PDF report with annotated photos and thermal images, as well as a digital 3D model of the roof. Some providers, like Visual Perspectives, include defect diagnostics, actionable insights, and compliance reports. Reports can be shared with insurers, contractors, and facility managers. They include measurements of roof area, slope, and specific defect locations.
Is thermal imaging included in standard drone roof inspections?
Not always. Many basic drone inspections only provide high‑resolution visual photos. Thermal imaging is an add‑on that requires a special drone and certified thermographer. About 50% of UK inspection providers offer thermal. Visual Perspectives includes thermal imaging with IEC 62446‑compliant reporting, which is essential for solar panel inspections and detailed moisture mapping.
How accurate are drone measurements for roof areas and defect locations?
Accuracy depends on the software and drone used. With proper flight planning (70‑80% overlap), photogrammetry can achieve 1‑3 cm accuracy. That’s enough for most commercial roofing needs , calculating material quantities, measuring defect areas, and positioning repairs. For sub‑centimetre accuracy, you need ground control points (GCPs) and high‑end processing.
Can drone inspections replace hands‑on inspection completely?
No. Drones provide exceptional visual and thermal data, but some tasks still need physical access: core sampling, destructive testing, or repairs. However, drones can identify exactly where those hands‑on checks are needed, reducing scaffolding to only the problem areas. The best approach is a hybrid: drone survey first, then targeted physical inspection.
What weather conditions are required for a drone roof inspection?
Ideal conditions are calm winds (below 20 mph), no rain, and good visibility. For thermal inspections, you need a clear night or when the roof is in deep shadow. Cloud cover can actually help as it prevents uneven solar heating. Avoid high winds, snow, or heavy rain , they affect flight safety and data quality.
Conclusion
Drone roof inspections have changed the game for commercial building maintenance. They’re safer, faster, and cheaper than traditional methods. You get complete coverage of your roof , every corner, every detail. And with thermal imaging, you can find hidden problems before they become expensive disasters.
We’ve covered the key points: why drones are better, how to choose the right drone, flight planning and UK regulations, data processing software, thermal imaging for defect detection, and the impressive ROI. Now it’s time to take action.
If you manage a commercial building or portfolio, consider scheduling a drone inspection this year. It could save you thousands. At Visual Perspectives, we specialise in managed drone inspections for commercial roofs across the UK. We combine high‑resolution visual and thermal data with IEC 62446‑compliant reporting to give you the insights you need.
Ready to see what your roof really looks like? Contact us today for a free quote. We’ll help you protect your building, your budget, and your peace of mind.

