
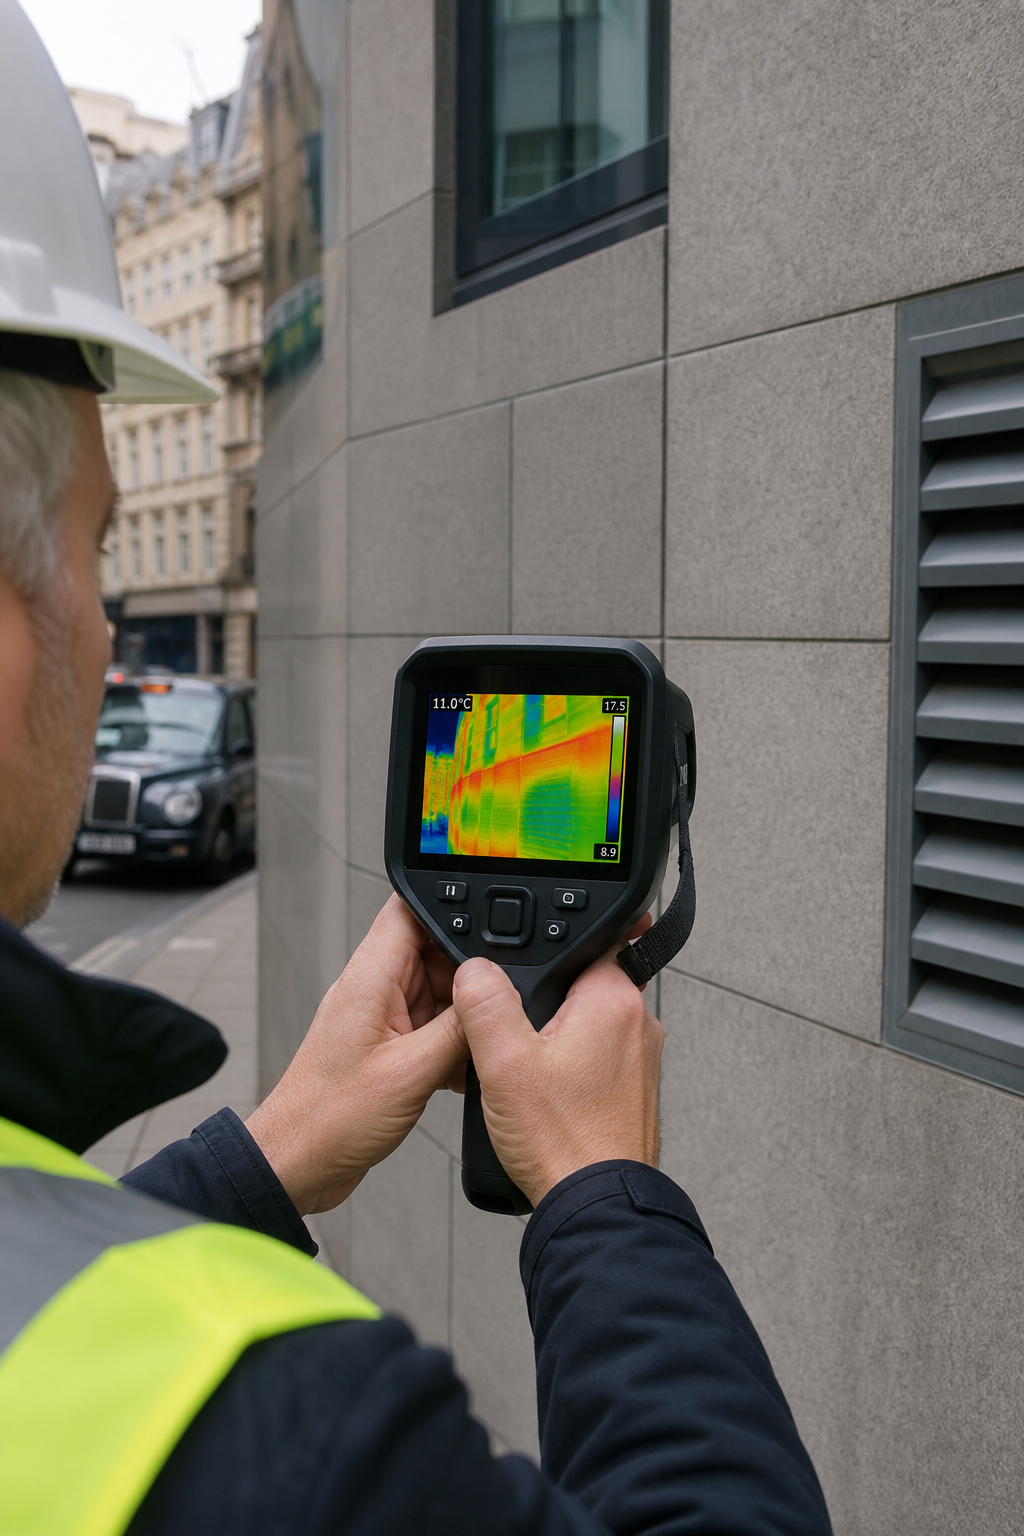
Ever wonder why a wall feels cold in winter even when the heating’s on? Or why your energy bills keep climbing despite sealing every draft? A thermal imaging survey can answer those questions. It’s like an X-ray for your building’s temperature. It sees heat loss, moisture, electrical faults, and missing insulation that the naked eye misses. In this article, we’ll walk through 20 key insights, from what a survey involves to how drone thermography is changing the game. Whether you’re a facilities manager, building surveyor, or property owner, these insights will help you make smarter decisions. Let’s get started.
1. What Is a Thermal Imaging Survey?
A thermal imaging survey uses an infrared camera to capture surface temperatures. Everything emits heat. The camera turns that heat into a colour image, warmer areas show as red or yellow, cooler as blue or purple. By looking at these patterns, experts can spot problems like damp, missing insulation, or overheating electrical components.
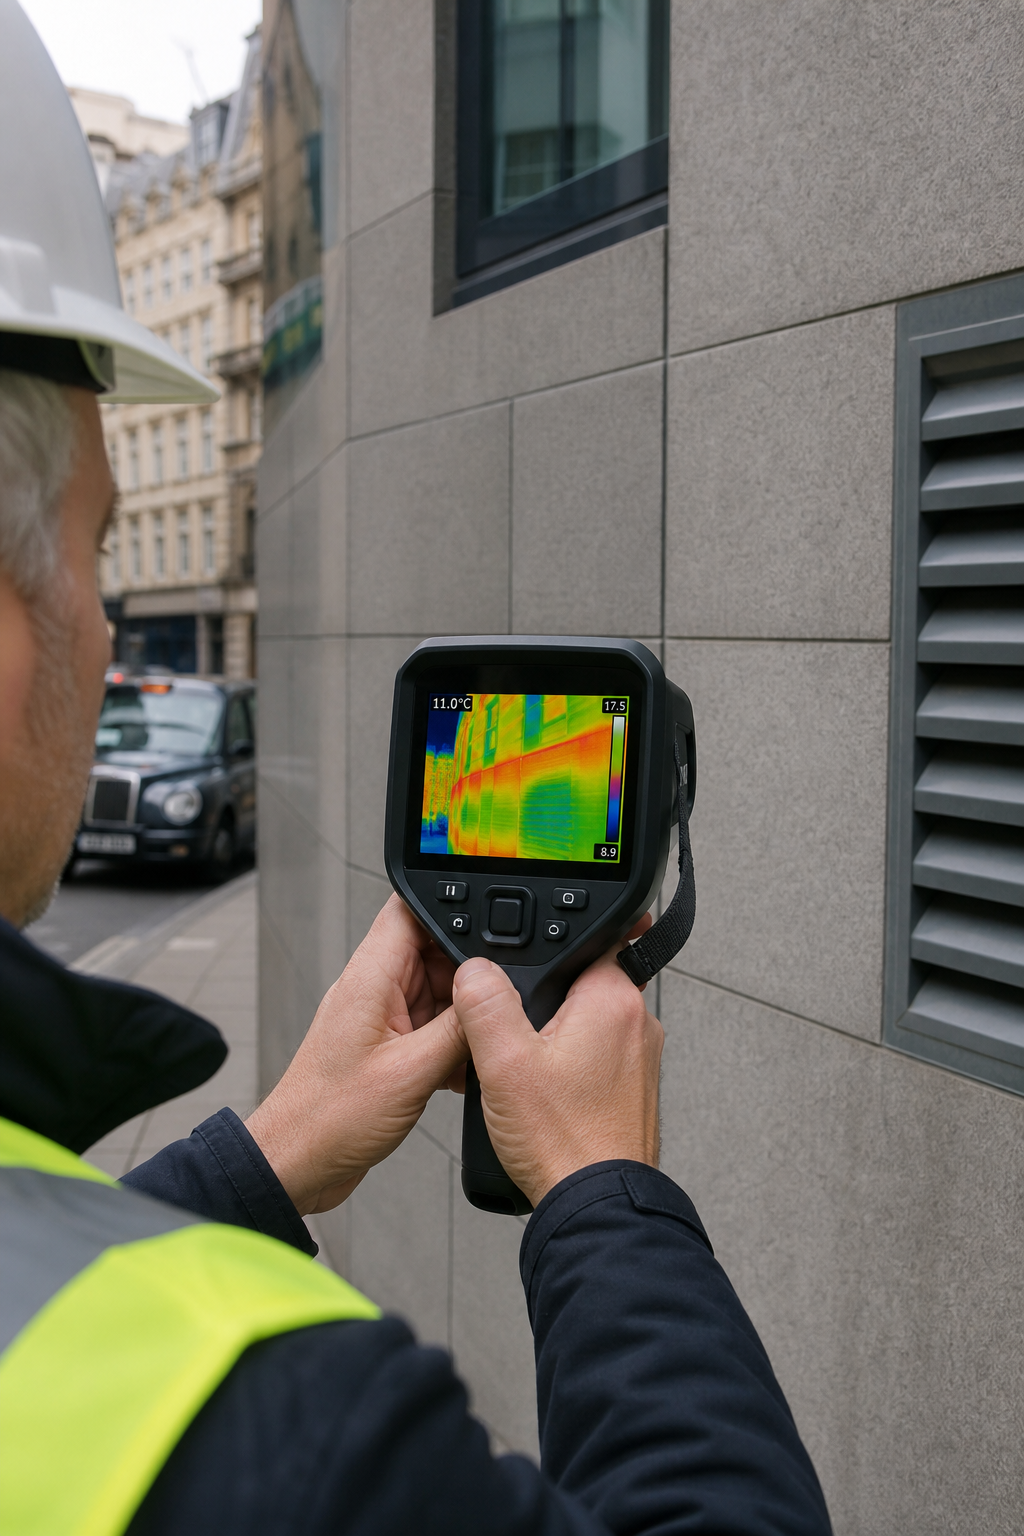
The process is non-invasive. No drilling, no cutting. It can cover large areas fast. According to the RICS Built Environment Journal, a successful survey requires a temperature difference of at least 10°C between inside and outside, which typically happens in winter. That’s when the building is heated and the outside is cold, making defects stand out.
Bottom line: Thermal imaging surveys are a non-destructive way to diagnose building issues by seeing heat patterns invisible to the human eye.
2. Key Benefits for Commercial Buildings
Why should a commercial property owner invest in a thermal imaging survey? Simple. It saves money, reduces risk, and improves energy efficiency. Here are the main benefits:
- Detect hidden problems early. A loose electrical connection can overheat for months before it fails. Thermal imaging catches it before a fire or outage.
- Reduce energy waste. Insulation gaps, air leaks, and thermal bridges waste heat. Fixing them can cut heating bills by 10, 30%.
- Minimise downtime. Most surveys are done while the building is operational. No need to shut down systems.
- Support decarbonisation goals. Identifying heat loss helps target upgrades, contributing to net-zero targets.
One study from FLIR highlights how thermal cameras are essential for moisture restoration, enabling quick identification of water intrusion. For commercial buildings, that means avoiding costly mould remediation and structural damage.
Bottom line: Thermal imaging surveys deliver actionable insights that lower operating costs and prevent failures.
3. Typical Applications: From Heat Loss to Electrical Faults
Thermal imaging surveys are used across many building systems. Common applications include:
- Building envelope. Find missing insulation, air leaks, thermal bridging, and cold spots.
- Electrical systems. Detect loose connections, overloaded circuits, faulty breakers, and hot spots.
- Mechanical equipment. Identify bearing wear, misalignment, and overheating motors.
- Roofing. Locate trapped moisture in flat roofs before it leaks inside.
- Solar PV arrays. Spot defective cells, hot spots, and bypass diode failures (see IEC 62446).
As Fluke explains, thermal imaging for electrical systems is one of the most common uses because many faults produce heat before they cause failure. A single scan can cover a whole switchboard in minutes.
Bottom line: Thermal imaging surveys apply to almost every building system, catching faults early in each one.
4. Equipment Used: Handheld, Pole-Mounted and Drones
Not all thermal surveys are the same. The equipment choice depends on the access and detail needed.
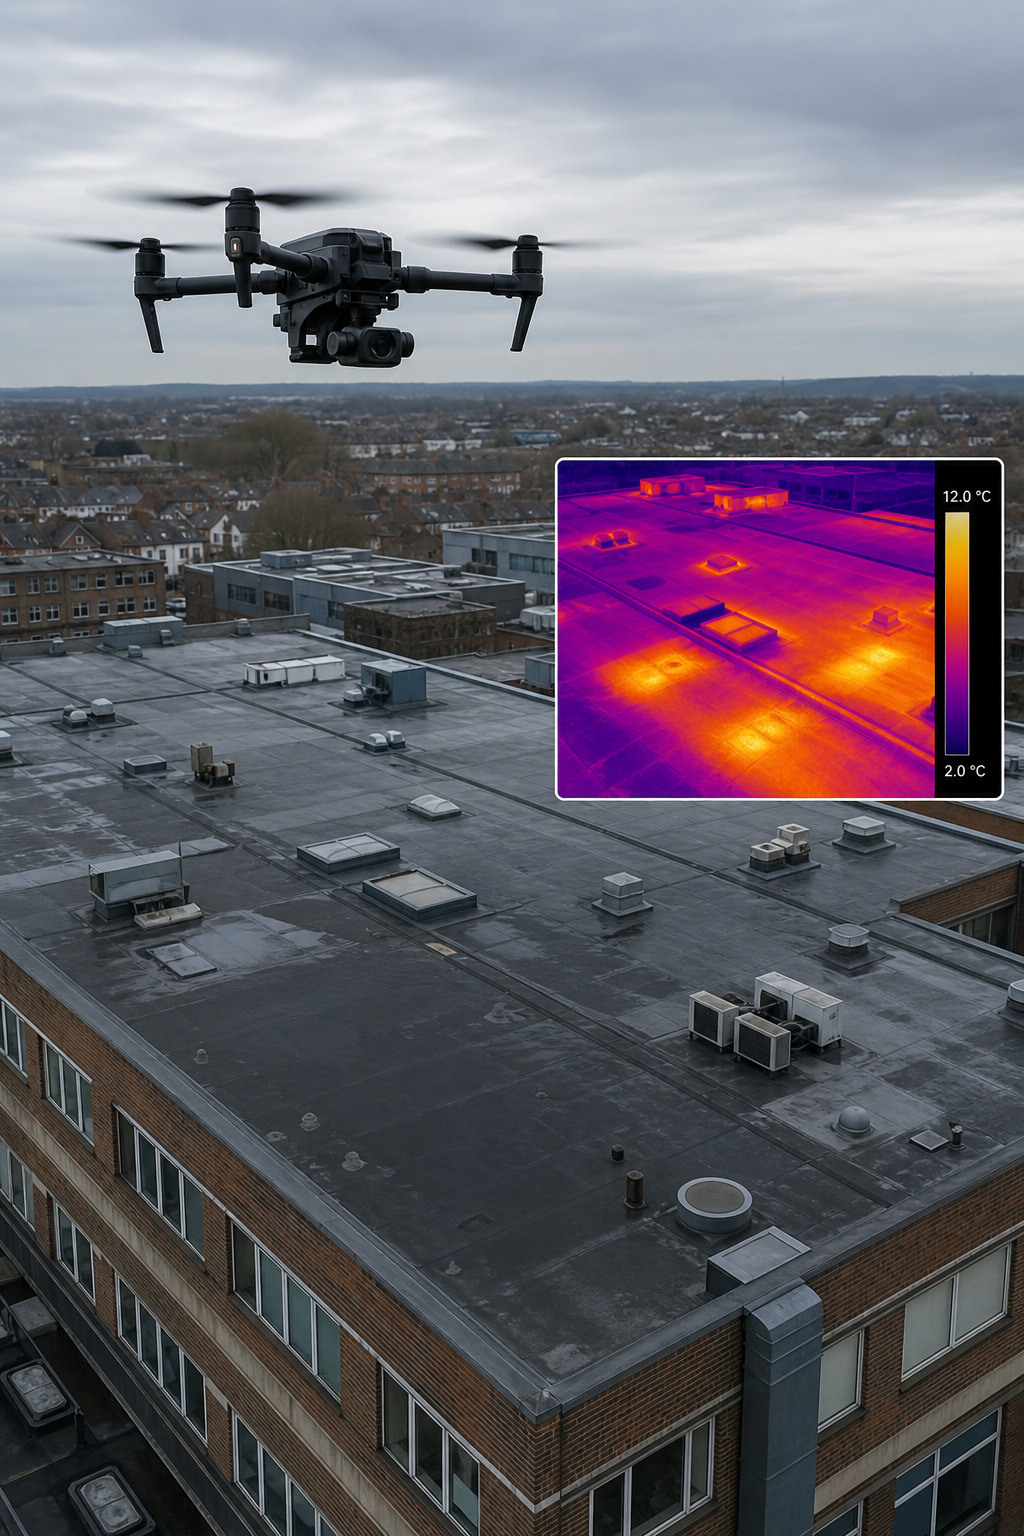
Drones equipped with high-resolution thermal cameras, like those used by Visual Perspectives, can survey an entire commercial roof in an hour, something that would take a whole day with scaffolding. Pole-mounted cameras, as described by Spy Associates, are excellent for inspecting improved ceilings without ladders.
Bottom line: Handheld, pole-mounted, and drone thermography each serve different access needs; drones offer the fastest coverage for large or risky areas.
5. Standard Survey Workflow
A professional thermal imaging survey follows a consistent workflow. First, the thermographer reviews the building plans and identifies key systems. Then they schedule the survey for optimal conditions, typically a cold morning after the building has been heated for 48 hours.
On site, they walk the interior and exterior, capturing thousands of images. They note ambient conditions like temperature, humidity, and wind speed. After data collection, they analyse the images using specialised software to identify anomalies. Finally, they produce a report with annotated images and recommended actions.
This process ensures that findings are accurate and actionable. As one experienced thermographer noted, “If you don’t have a 10°C delta, you’re wasting your time.”
Bottom line: A standard thermal imaging survey involves pre-inspection, capture, analysis, and reporting, each step critical for reliable results.
6. Why Drone-Based Surveys Are Transforming Commercial Inspections
Drones have revolutionised thermal imaging surveys. They can access roofs, facades, and improved structures without scaffolding or cherry pickers. That means faster surveys, lower costs, and no worker safety risks.
A drone can carry a high-resolution thermal camera and capture data from multiple angles. The result is a complete thermal map of the entire building envelope. According to Drones Plus Robotics, drone thermal surveys improve inspection speed by up to 80% compared to manual methods.
For solar PV arrays, drones are especially valuable. They can fly over large rooftop installations and detect hot cells caused by defects or shading, all without putting personnel at risk. Visual Perspectives offers drone-based aerial building inspection services that combine visual and thermal data for a complete picture.
Bottom line: Drone-based thermal imaging surveys provide safer, faster, and more detailed inspections for commercial buildings.
7. Legal and Certification Standards (BREEAM, NFPA, ITC)
Thermal imaging surveys aren’t just about taking pictures. They must follow standards to ensure reliability. For building envelope surveys, BREEAM recommends ISO 6781:1983 as the appropriate standard for qualitative detection of thermal irregularities.
For electrical systems, NFPA 70B and NFPA 70E guide safety and inspection practices. And for solar PV, IEC 62446-3 provides the specific requirements for thermographic inspection of photovoltaic panels, including minimum resolution (5×5 pixels per cell) and weather conditions.
Certifications matter too. The Infrared Training Center (ITC) offers Level 1 and 2 courses that certify thermographers. At Visual Perspectives, we hold ITC Level 1 and 2 certifications, ensuring our surveys meet professional standards.
Bottom line: Compliance with standards and certifications ensures your thermal survey is credible and defensible.
8. Cost Breakdown: What Does a Commercial Thermal Survey Cost?
Costs vary depending on building size, complexity, and access. A small office might cost £500, £1,500. A large commercial roof with solar PV can range from £2,000 to £5,000. Drone surveys add value but not huge cost, typically £1,000, £3,000 for a full building envelope.
According to Electrical Testing London, prices in the UK start around £300 for a basic electrical thermal survey and go up to several thousand for complete building surveys. Another source, Averroes AI, notes that thermal drone inspections average $350, $600 per session, with solar farm inspections costing $300, $500 per MW.
Though it’s an investment, the return is clear: catching one electrical fault can save thousands in repairs and prevent downtime.
Bottom line: Thermal imaging survey costs are modest compared to the potential savings from early defect detection.
9. Technical Limitations: Emissivity, Reflections and Weather
Thermal cameras don’t see through walls. They only measure surface temperatures. And those temperatures can be misleading if you don’t account for emissivity, the material’s ability to emit infrared energy. Shiny metal has low emissivity and reflects nearby heat sources, giving false readings.
As FLIR explains, if you measure a polished metal pipe, the camera might show the reflection of a warm person behind it, not the pipe’s actual temperature. That’s why trained thermographers adjust emissivity settings and use reference materials.
Weather also plays a role. Rain, snow, and strong winds cool surfaces evenly, hiding defects. Surveys should be done in dry, calm conditions with a temperature difference of at least 10°C. Fluke’s guide discusses how to fix reflectivity issues by using high-emissivity tape or paint on reflective surfaces.
Bottom line: Thermal imaging is powerful but has limits; proper training and conditions are non-negotiable for reliable results.
10. Case Study: Electrical Fault Detection in a Commercial Office
Imagine a three-storey office building. The lights flicker occasionally, but no one thinks much of it. A thermal imaging survey reveals a breaker panel with a 90°C hot spot on the main feed. The cause? A loose connection that was arcing. The fix took 30 minutes and cost £200 in parts. Without the survey, it could have caused a fire.
This case is typical. As noted by Integra Electrical, thermal imaging reveals hidden electrical issues without invasive inspection. It’s especially valuable in older buildings where wiring may be degraded.
Bottom line: Regular thermal imaging surveys of electrical systems can prevent catastrophic failures and keep buildings safe.
11. Case Study: Moisture Detection in Flat Roofs
Flat roofs are prone to moisture trapped under the membrane. Water enters through small breaches and spreads, saturating insulation. Visually, the roof looks fine. But a thermal survey reveals large cool areas where moisture is present, water holds heat longer than dry insulation, so it appears cooler at night.
Using a drone with a thermal camera, Visual Perspectives mapped a 5,000 m² flat roof on a distribution centre in just 90 minutes. The survey identified six distinct wet areas. Targeted repairs saved the client £40,000 compared to full replacement. Fluke’s guide to infrared roof inspections explains that this method is the most effective way to assess roof moisture.
Bottom line: Thermal imaging surveys detect hidden moisture in flat roofs, enabling targeted repair and saving significant costs.
12. Solar PV Thermography: IEC 62446 Compliance
Solar PV systems degrade over time. Hot cells, bypass diode failures, and string mismatches reduce energy output and can cause safety hazards. IEC 62446-3 specifies how to perform thermographic inspections of PV arrays. It requires that each cell be covered by at least 5×5 pixels in the thermal image.
As Hikmicro explains, choosing the right thermal camera and distance is critical. At Visual Perspectives, we use high-resolution drone-mounted cameras that meet these requirements, ensuring our surveys are IEC-compliant. We’re one of the few providers that explicitly align with IEC 62446.
Bottom line: Standardised thermography for solar PV guarantees accurate defect detection and supports warranty claims.
13. Troubleshooting: Dot-and-Dab Moisture
In modern buildings, plasterboard is often fixed to walls with dot and dabs of adhesive. If the adhesive creates a thermal bridge, moisture can travel along it. On a thermal image, these dots appear as cold spots (if damp) or hot spots (if dry and conducting heat).
A common issue: the adhesive “dab” becomes a wick, drawing moisture from the outer wall to the inner plasterboard. The homeowner sees paint blistering but doesn’t know why. A thermal survey reveals the pattern, cold dots in a grid. The solution involves removing the plasterboard, treating the wall, and installing a vapor barrier.
Bottom line: Thermal imaging surveys can spot moisture bridging through dot-and-dab adhesive, guiding effective remediation.
14. Troubleshooting: Penetrating Damp
Penetrating damp occurs when water enters through a building’s envelope, cracked brickwork, failed pointing, or leaking gutters. On a thermal image, damp areas appear cool, especially on a cold day. The camera can trace the path of moisture across a wall.
According to Elmbridge Damp Proofing, combining thermal imaging with moisture meters gives the most accurate diagnosis. A thermographer spots the damp pattern, then a moisture meter confirms the level. This two-step approach prevents misdiagnosis, for example, mistaking condensation for penetrating damp.
In one case, a building had been treated for rising damp for years, but thermal imaging showed the moisture came from a missing gutter. The repair cost £500, not thousands.
Bottom line: Thermal imaging surveys efficiently locate the source of penetrating damp, avoiding unnecessary and expensive treatments.
15. Troubleshooting: Missing Insulation
Missing or slipped insulation is extremely common in older cavity walls and lofts. The occupant feels cold, but can’t reveals large blue (cold) areas on the interior wall surface, often in a patchy pattern.
In one survey by Visual Perspectives, a school’s assembly hall had a cold north wall. The thermal image showed that the cavity insulation had fallen to the bottom over 10 years. The fix: cavity wall insulation replacement, restoring comfort and cutting heating costs by 20%.
As explained in Skill Builder’s thermal imaging video, cold bridging often occurs at the junction of walls and ceilings where insulation is inconsistent. A thermal survey highlights these transition points.
Bottom line: Thermal imaging surveys identify insulation gaps that drive energy waste, enabling targeted remedial work.
16. Thermal Survey vs. Traditional Inspection: A Comparison
As Thermal Camera Guide notes, thermal surveys can find issues that visual checks miss entirely, such as moisture behind cladding or overheating in sealed electrical cabinets. The upfront cost is higher, but the long-term savings are significant.
Bottom line: Thermal imaging surveys outperform traditional inspections in speed, safety, and defect detection rate.
17. How Often Should You Schedule a Thermal Imaging Survey?
Frequency depends on the building age, usage, and risk. For general commercial buildings, an annual survey is recommended. For electrical systems, many insurers now require yearly thermography to maintain coverage. For flat roofs, a survey every 3, 5 years catches moisture before leaks occur. Solar PV arrays should be inspected annually (or after extreme weather) to spot damage patterns.
If you’re planning a major retrofit or decarbonisation project, a baseline thermal survey is essential to measure effectiveness later. Visual Perspectives can help you set up a schedule that aligns with your asset management plan.
Bottom line: Annual thermal imaging surveys are the industry standard for commercial buildings, with specific systems needing more frequent checks.
18. Actionable Reporting and Data Analysis
A good thermal survey report is more than a collection of colourful images. It should include:
- Annotated thermal images with temperature scales
- Visual (RGB) comparison images
- Location of each anomaly (floor, wall section, panel)
- Severity rating (critical, urgent, minor)
- Recommended remedial actions
As Fluke states, the report must translate raw data into decisions. Software like FLIR Thermal Studio helps organise thousands of images and generate professional reports. For asset managers, integrating data into a Building Information Model (BIM) is becoming more common.
Bottom line: Professional reporting transforms thermal data into a practical roadmap for building improvements.
19. Integration with BIM and Asset Management
Thermal data is increasingly being integrated into Building Information Models (BIM). This creates a “thermal digital twin” that can be used for energy simulation, maintenance planning, and comfort analysis. A recent study in Frontiers in Built Environment demonstrates a workflow to embed thermal point clouds into IFC files, making thermal data natively accessible in BIM software.
For asset managers, having thermal data linked to each building element means you can track insulation performance, roof moisture, and electrical health over time. At Visual Perspectives, we can provide thermal data in formats compatible with your existing asset management systems, including IFC and GIS.
Bottom line: Integrating thermal imaging survey results into BIM enables continuous monitoring and smarter facility management.
20. Future Trends in Thermography for 2026 and Beyond
The thermal imaging market is growing rapidly. According to a LinkedIn market report, the mounted thermal imagers market is projected to grow by 8.9% annually from 2026 to 2033. Key trends include:
- AI-powered analysis. Machine learning algorithms can automatically detect and classify anomalies from thousands of images, reducing human error.
- Integrated sensors. Combining thermal with RGB, LiDAR, and multispectral cameras for a complete building scan.
- Real-time monitoring. Fixed thermal cameras providing continuous data for predictive maintenance.
- Digital twins. As mentioned, thermal data integration into BIM/GIS for full asset management.
These trends mean that thermal imaging surveys will become even more valuable, offering deeper insights faster. Visual Perspectives is already adopting these technologies to stay ahead.
Bottom line: Advancements in AI and sensor fusion are set to make thermal imaging surveys an indispensable part of building management.
Frequently Asked Questions
How often should I get a thermal imaging survey for my commercial building?
For most commercial buildings, an annual survey is recommended. If you have high-risk assets like electrical switchgear or a flat roof, consider bi-annual or quarterly scans. Insurance policies often require yearly electrical thermography. For solar PV, an annual survey after winter storms is ideal. A baseline survey before and after major retrofits is also wise to measure improvement.
Can a thermal imaging survey detect water leaks in walls?
Yes. Water has a different thermal capacity than dry building materials. When the building heats up, wet areas absorb and retain heat longer, so they appear warmer at night. During the day, evaporation from wet patches can cause cooling. With proper technique and conditions, thermographers can trace moisture paths behind walls without destructive opening.
What is the difference between a cat 1 and cat 2 thermographer?
ITC Category 1 is the entry-level certification, covering basic theory and safe use of thermal cameras. Category 2 is more advanced, focusing on quantitative measurement and complex analysis. For commercial building surveys, it’s best to hire a provider with at least Category 2 qualified engineers, as they can provide temperature measurements and detailed reports that hold up to scrutiny.
Do I need to prepare my building before a survey?
Yes. The building should be heated to at least 20°C for 48 hours before the survey. All external walls should be clear of furniture and curtains. For electrical surveys, all circuits should be under normal load. For roof surveys, ensure the roof is dry and free of snow or ponding water. Your provider will give you a checklist.
Is thermal imaging safe for occupied buildings?
Absolutely. Thermal imaging is completely non-invasive and uses no radiation. It’s safe for offices, schools, hospitals, and homes. The survey can be conducted during normal working hours without disrupting occupants. Drone surveys for roofs and facades also have minimal impact on building users, as long as safety zones are respected.
How long does a commercial thermal survey take?
It depends on the size and complexity. A small office (500 m²) with electrical focus might take 2, 3 hours. A large commercial building (5,000 m²) with roof, facade, and solar PV could take a full day. Drone surveys cover large roofs in 1, 2 hours. The provider will give an estimate after a site ing plans.
What is IEC 62446 and why does it matter for solar PV?
IEC 62446-3 is an international standard that defines how thermal imaging should be performed on photovoltaic systems. It specifies camera resolution, distance, weather conditions, and defect classification. Compliance ensures your survey is technically valid and accepted by insurers, manufacturers, and warranty providers. Always ask if your provider follows this standard.
Can thermal imaging see through walls?
No. Thermal cameras only measure the surface temperature of objects. They cannot see through solid walls. However, they can detect temperature differences on the wall surface that indicate issues behind it, like a hot wire carrying current through a stud, or a cold patch from a water leak in the insulation behind the plasterboard.
Conclusion
Thermal imaging surveys are no longer a luxury, they’re a necessity for any commercial building owner, facility manager, or surveyor serious about safety, efficiency, and sustainability. From detecting electrical faults before they cause fires to locating moisture that leads to mould, the insights gained from a single survey can save thousands of pounds and prevent major disruptions.
We’ve covered 20 key insights in this guide, from the basics of how thermal imaging works to the latest trends like AI and digital twins. The key takeaway is that a well-executed thermal survey, conducted by certified professionals using modern equipment, provides data you simply cannot get from a visual inspection alone.
At Visual Perspectives, we specialise in drone-based thermal imaging surveys for commercial buildings across the UK. Our surveys comply with IEC 62446 for solar PV and follow best practices for building diagnostics. We provide actionable reports that help you prioritise repairs, reduce risk, and meet decarbonisation targets.
Ready to see what you’ve been missing? Contact Visual Perspectives today for a free consultation and quote. Your building’s hidden problems might be costing you more than you think.

