
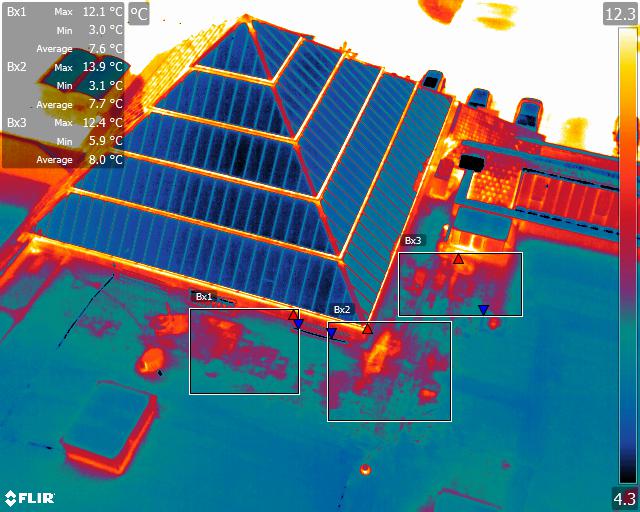
Ever wonder why a simple infrared camera can spot a hidden leak that a moisture meter misses? I’m about to walk you through the exact tricks pros use to turn temperature differences into a clear map of wet spots, so you can catch moisture before it turns into a disaster. This guide is for building surveyors, facilities managers, and anyone responsible for commercial property in the UK. We’ll cover the full workflow: prepping gear, scanning systematically, reading thermal patterns, verifying with meters, and avoiding the common traps that trip up even experienced inspectors. By the end, you’ll have a repeatable process that saves time, cuts costs, and keeps your buildings dry. Let’s get started.
Table of Contents
- Step 1: Prepare Your Equipment and Environment
- Step 2: Conduct a Systematic Thermal Scan
- Step 3: Interpret Thermal Patterns for Moisture
- Step 4: Verify with Moisture Meters
- Step 5: Account for Limitations and Environmental Factors
- Conclusion
Step 1: Prepare Your Equipment and Environment
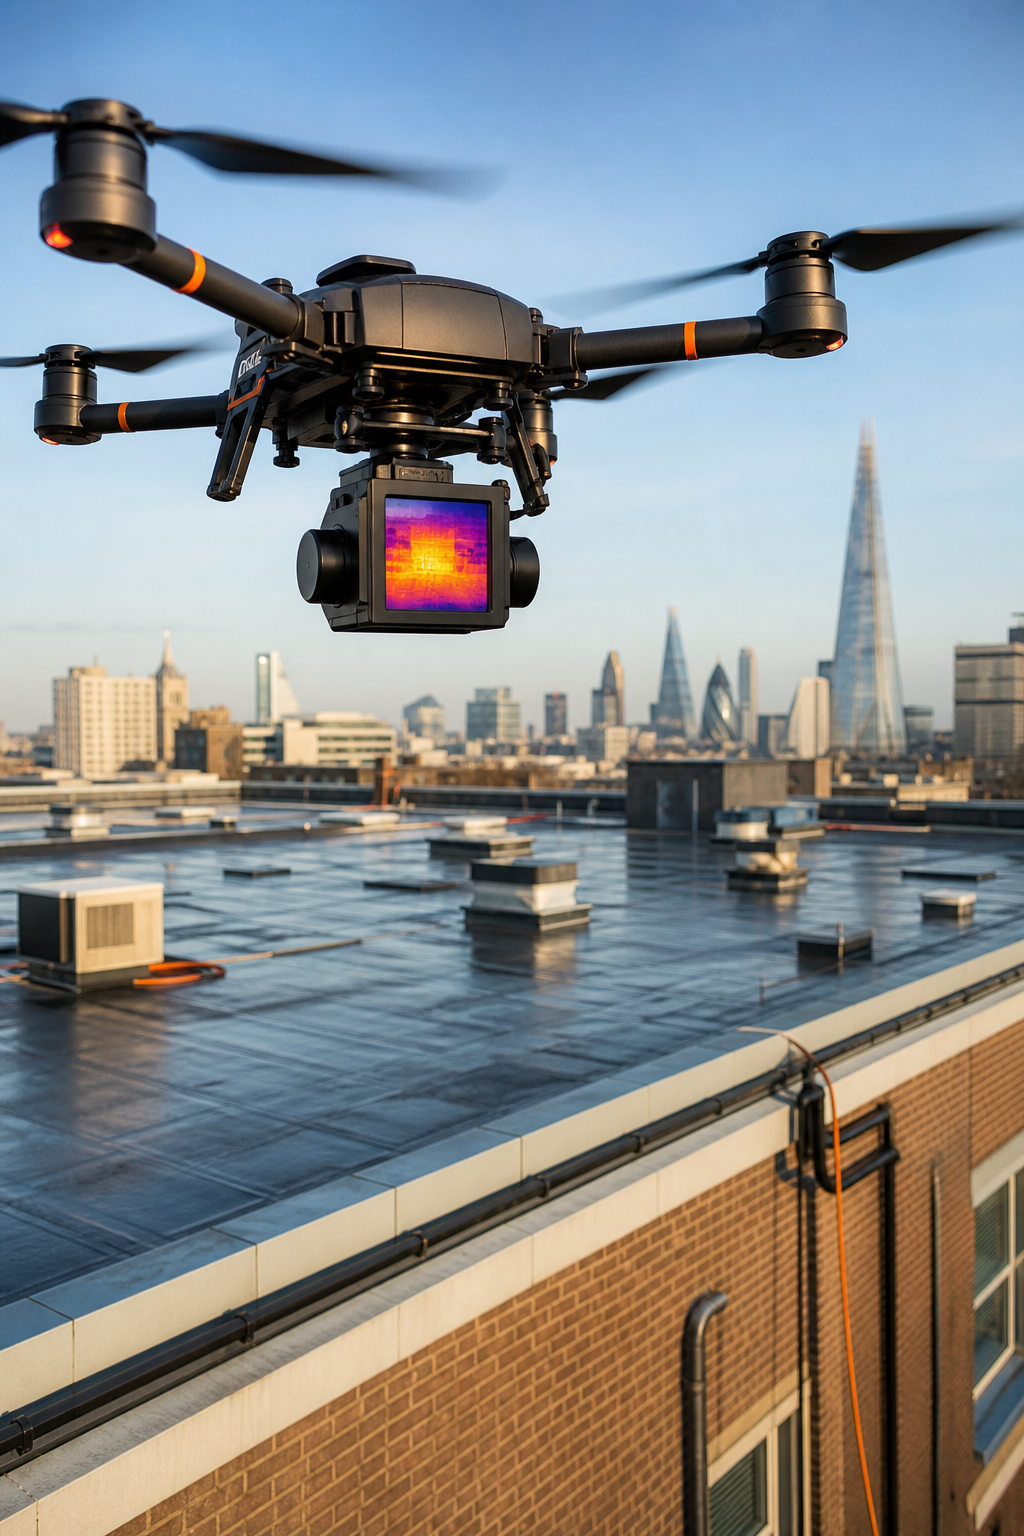
Before you point a thermal camera at a wall, you need to get the setup right. That means choosing the right camera, checking the weather, and making sure the building conditions are ideal for a thermal scan. At Visual Perspectives, we use high-performance industrial drones equipped with thermal imaging cameras compliant with IEC 62446, the international standard for photovoltaic system testing. But whether you’re using a handheld or a drone, the principles are the same.
Choose your thermal camera
Not all thermal cameras are created equal. For commercial moisture detection, you want a camera with good thermal sensitivity (NETD below 50 mK) and a resolution of at least 160×120 pixels. A popular smartphone thermal camera attachment is available, but for larger buildings, a dedicated handheld thermal camera or a drone-mounted system gives better results. The IEC TS 62446-3:2017 standard specifies a geometric resolution of ≤3 cm/pixel for solar inspections, which also works well for moisture detection on roofs and facades.
Check environmental conditions
Thermal imaging relies on temperature differences. For moisture detection, the best conditions are when the building has been heated or cooled consistently for several hours. That creates a strong thermal gradient between wet and dry areas. According to the standard, environmental conditions should meet: irradiance ≥600 W/m², wind speed ≤4 Bft, cloud cover ≤2 okta, and soiling loss ≤10%. In practice, early morning or late evening are ideal because you avoid solar reflection and get stable temperatures. Avoid rainy or foggy days, water in the air scatters infrared radiation and blurs your images.
Prepare the building
Turn on heating or cooling systems 12-24 hours before the survey. The bigger the temperature difference between inside and outside, the easier it is to spot moisture. If you’re inspecting a flat roof, make sure it’s dry on the surface (no puddles). Inside, remove any obstructions like furniture against walls. Close windows and doors to maintain consistent interior conditions. Also, note the emissivity of the surfaces you’re scanning, most building materials have an emissivity around 0.9, but shiny metals need adjustment. Most modern cameras let you set emissivity per material.
Calibrate and warm up
Turn on the camera at least 10-15 minutes before you start. Let it stabilize to ambient temperature. Set the temperature range to match the expected conditions (e.g., 10-30°C for indoor scans). Choose a color palette that highlights cold spots, many pros use a grayscale or ironbow palette because moisture typically appears as dark blue or purple. Enable MSX mode if your camera has it; it overlays visible edges on the thermal image to make patterns easier to identify.
Key Takeaway: Proper preparation, right camera, good weather, stable building conditions, is the foundation of any successful thermal moisture survey. Skip this step and your results will be unreliable.
Step 2: Conduct a Systematic Thermal Scan
Once your equipment is ready, it’s time to scan the building methodically. This isn’t about pointing the camera randomly. You need a plan that covers all likely moisture entry points and hidden areas. Think of it like a grid search: every square metre gets checked once, but you linger on high-risk zones like roof penetrations, pipe runs, and windows.
Start outside
Begin with the exterior envelope. Walk around the building and scan walls, especially at the base where ground moisture can wick up. Look for cold patches on the facade that might indicate leaking gutters, faulty flashings, or failed sealant. For flat roofs, a drone-mounted thermal camera is invaluable because it gives you an overhead view without putting anyone at risk. At Visual Perspectives Limited, our drone surveys capture both visible and thermal images, covering every section of the roof systematically. The IEC standard recommends a minimum camera angle of 30° from the surface to avoid reflection and ensure accurate temperature readings.
Move inside
Inside, focus on the areas where water pipes, HVAC ducts, and plumbing fixtures are located. Start from the highest point (top floor, attic) and work down. Moisture often runs along joists or beams, so scan along lines of possible water travel. Check behind toilets, under sinks, around water heaters, and near exterior windows. Don’t forget corners, moisture collects there first. Keep a consistent distance from the surface (about 1-2 metres for handheld cameras) to maintain focus and scale.
Use the right technique
Pan the camera slowly. If you move too fast, the image blurs and you miss subtle temperature differences. For drone surveys, keep flight speed under 5 m/s to avoid motion blur. Always capture a reference image of a known dry area for comparison. When you find an anomaly, take multiple images from different angles and zoom in if possible. Note the exact location (room, wall, height) and the temperature difference. According to the research, only 1% of tutorials mention a numeric threshold, but the IEC standard specifies a ΔT of 2°C as the trigger for further investigation.
Document everything
Modern thermal cameras let you store voice notes and visible light photos alongside thermal images. Use them. Label each image with a unique identifier and a brief description. This documentation is important for reports and for tracking changes over time. If you’re using a drone, the flight log automatically records GPS coordinates, making it easy to pinpoint problem areas. For indoor surveys, use a floor plan or sketch to mark anomaly locations.
As one experienced inspector put it, “If your inspector is not using infrared, find someone that does.” But infrared alone isn’t enough, you need a systematic process to ensure you don’t miss anything.
Step 3: Interpret Thermal Patterns for Moisture
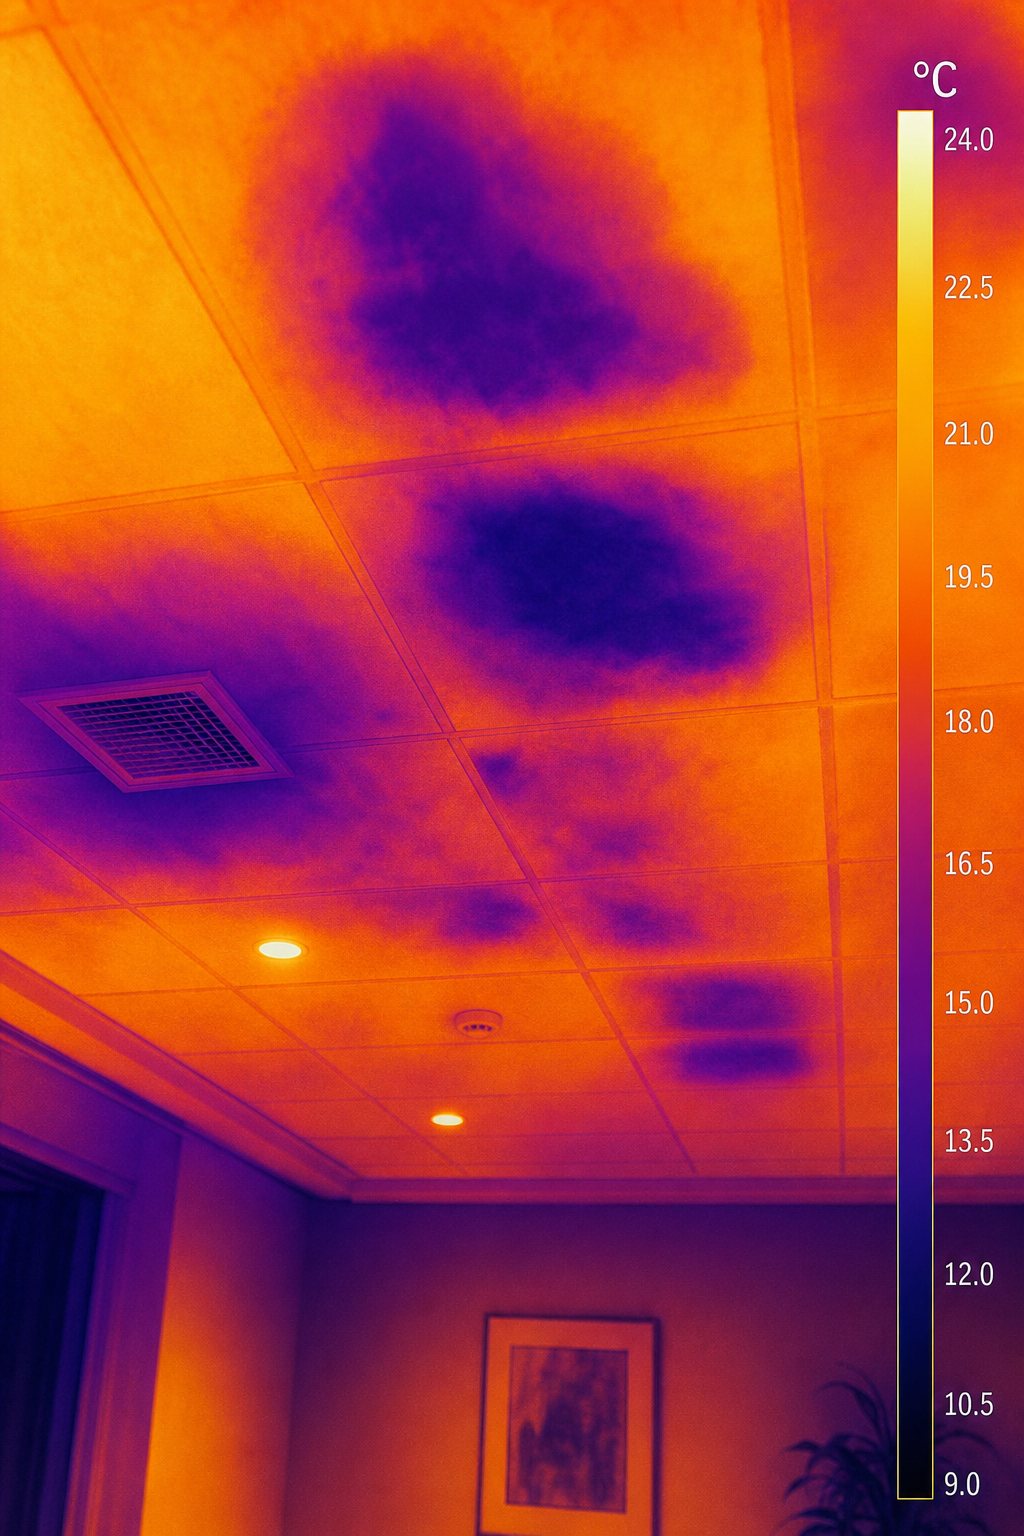
Interpreting thermal images is where experience really matters. The camera shows temperature differences, not moisture directly. A cold spot can mean wet insulation, but it can also be a draft, missing insulation, or even a shadow. Your job is to tell the difference.
Understand evaporative cooling
When moisture is present, it evaporates. Evaporation removes heat from the surface, making it cooler than the surrounding dry area. That’s why moisture often appears as a cold patch on a thermal image. This is called evaporative cooling and it’s the most common indicator. Look for irregularly shaped cool areas that don’t follow structural lines. They often have a ‘blob’ or ‘cloud’ shape. Sharp, straight lines usually indicate thermal bridging or missing insulation, not moisture.
Recognise common patterns
Water leaking from a pipe tends to create a streak or path downward. If the leak is slow, the cold spot might be small and faint. Roof leaks often show as large cool areas on the ceiling, sometimes with a warm spot where the water first entered (if the roof is hot from the sun). For flat roofs, moisture trapped under the membrane appears as large, diffuse cool zones. In walls, wet insulation can show as a cooler rectangle or patch. The key is to look for pattern repetition versus isolated spots.
Rule out false positives
Thermal images can fool you. Here are common false positives to watch for:
- Air leaks: Cold air from a draft hits a warm wall and creates a cool pattern that looks like moisture. Use a moisture meter to confirm.
- Thermal bridging: Metal studs or concrete beams conduct heat differently, creating cold lines that are structural, not wet.
- Reflections: Shiny surfaces like windows or metal reflect the environment, showing a false temperature. Change your angle to confirm.
- Sun patches: If the sun hit a wall an hour ago, that area might still be warm while the rest is cool, ignore it.
Use the right palette and gain
Most thermal cameras let you adjust the level and span (the range of temperatures shown). For moisture detection, set the span as narrow as possible around the background temperature, this amplifies the contrast. If you leave the span too wide, small temperature differences won’t show. A blue-orange or ironbow palette often works best because the human eye is good at distinguishing these colours. Avoid the rainbow palette if you can; it can create false edges. Some cameras have an ‘ice’ palette that turns cold spots bright blue with a black border, ideal for moisture.
As the research from a trade publication points out, many technicians mistake cold spots for wet spots without verifying. Always cross-check with a moisture meter before cutting into walls.
Pro Tip: Take a thermal image of a known dry area first, like a concrete floor in the same room. Use that as your baseline for colour and brightness. That way, you’re comparing to a operational reference, not just the camera’s auto-scale.
Step 4: Verify with Moisture Meters
Thermal imaging tells you where to look, but only a moisture meter can confirm if it’s actually wet. This two-step process, scan first, then measure, is the gold standard for moisture detection. Do not rely on thermal images alone, because false positives are common.
Choose the right moisture meter
There are two main types of moisture meters: pinless and pin-type. Pinless meters (also called non-invasive) use electromagnetic waves to scan for moisture behind surfaces without leaving marks. They’re great for quick checks. Pin-type meters have probes that penetrate the material to give a direct reading of moisture content. They’re more accurate but leave tiny holes. Many inspectors carry both. A versatile option is an imaging moisture meter that combines a thermal camera with a pinless sensor and an external pin probe, letting you see the cold spot and measure it with one device.
Correlate thermal findings
When you find a cold spot on the thermal image, mark it. Then use the moisture meter to measure the same spot and a nearby dry spot for comparison. If the cold area reads significantly higher moisture content (e.g., >20% on wood or >5% on drywall), you’ve confirmed a leak. If the meter shows normal readings, the temperature difference might be due to other factors like air gaps or thermal bridging. Using both tools together saves time and improves accuracy.
Document the evidence
Take a photo of the moisture meter reading next to the thermal image. Some meters that combine thermal and moisture sensors let you overlay moisture data onto the thermal image and store it all in one file. This creates a compelling evidence package for reports to clients or insurers. Include the date, location, and reading in your log. For large commercial buildings, we recommend creating a moisture map that shows all anomalies with their confirmed status. At Visual Perspectives, our reports include both thermal and visible images with moisture readings, giving you a complete picture.
Step 5: Account for Limitations and Environmental Factors
Thermal imaging is powerful, but it has limits. Ignoring them leads to missed leaks or false alarms. Here’s what to watch out for.
Weather and atmospheric constraints
Rain, fog, and high humidity degrade image quality because water droplets absorb and scatter infrared radiation. Thermal washout occurs when the heat distribution becomes too uniform, blurring details. The research indicates that the meteorological optical range (MOR) should be greater than 15 metres for stable imaging. Wind speeds above 4 Bft can cool surfaces unevenly, creating false temperature drops. Direct sunlight heats surfaces and creates reflections, so always scan early morning or late evening. If you must scan during the day, try to do it on the shaded side of the building.
Material and surface issues
Different materials emit infrared radiation differently. A shiny metal pipe might appear cold even if it’s hot because of low emissivity. Adjust emissivity settings on your camera for the material you’re scanning (most plaster walls are about 0.9, but metals can be as low as 0.2). Also, thin materials like single-skin metal roofs cool off quickly when the sun goes down, so you might miss moisture if you scan at the wrong time. Thick materials like concrete take longer to change temperature, so moisture may not show a strong signal for hours.
Depth and hidden areas
Thermal cameras only see surface temperature. Moisture deep inside insulation or behind thick masonry may not create a visible cold patch. If you suspect a leak but the thermal scan shows nothing, you may need to reintroduce conditions, for example, run hot water down the drain and watch for the pipe to warm up (and look for cold where it leaks). The simple tutorials often miss this nuance: they show you how to switch to infrared view but never mention environmental limits, flight parameters, or calibration. That gap leads to missed moisture.
Time and access constraints
For a thorough survey, you need time for the building to reach steady-state conditions. A quick 15-minute walkaround won’t catch everything. Also, you need access to all areas, behind furniture, above ceiling tiles, and on roofs. Drones help with high and hazardous areas, but indoor surveys still require physical access. Plan your inspection during off-hours when the building is unoccupied and stable.
By understanding these limitations, you can plan your survey for the best results and avoid the pitfalls that lead to false readings. The standard-driven workflow from IEC 62446 gives you a framework that covers all these factors, ensuring consistent and reliable data.
Conclusion
Thermal imaging moisture detection is one of the most effective tools for catching hidden water damage in commercial buildings. But it’s not a magic trick. It requires the right equipment, proper environmental preparation, a systematic scan, careful interpretation, and confirmation with moisture meters. By following the five steps outlined in this guide, you can turn a thermal camera into a reliable diagnostic instrument that saves your clients time, money, and risk.
We at Visual Perspectives have been applying this workflow for years, using high-resolution drone surveys and ITC Level 1 and 2 thermography to help building surveyors, asset managers, and facilities teams across the UK. Our reports are compliant with IEC 62446 where applicable, and we deliver actionable insights, not just pretty pictures. If you’d like to looks like, check out our guide on thermal imaging surveys for more details. Or, explore how drone thermal imaging can cover large commercial roofs quickly and safely.
Remember: the goal is to find the moisture before it finds your wallet. With a solid process and the right tools, you can protect your buildings and your bottom line.
Frequently Asked Questions
What is the best thermal camera for moisture detection in commercial buildings?
For commercial use, a camera with at least 160×120 resolution and <50 mK sensitivity is recommended. Popular handheld options are available from various manufacturers. For larger roofs and facades, a drone-mounted thermal camera provides better coverage and safety. At Visual Perspectives, we use industrial drones with cameras meeting IEC 62446 standards for solar inspections. The best camera depends on your budget and typical inspection size.
How often should I recalibrate my thermal camera?
Most manufacturers recommend recalibration every 1-2 years, or after any physical impact. Frequent temperature checks against a known reference (like an ice bath or a calibrated blackbody) can help you spot drift. If you notice inconsistent readings or the camera fails to calibrate properly, send it in immediately. A mis-calibrated camera can lead to false readings and missed moisture.
Can thermal imaging detect moisture behind thick concrete walls?
It’s difficult. Concrete is a good thermal conductor, but moisture deep inside may not create a surface temperature difference strong enough to detect. Thick walls also take longer to reach steady-state conditions. If you suspect a leak in a concrete wall, try to identify it by other means, such as a pressure test or listening for drips. Thermal imaging can sometimes find moisture near the surface if the wall has been heated or cooled consistently.
Is thermal imaging safe for occupied commercial buildings?
Yes, it’s completely non-invasive and poses no radiation risk. Thermal cameras simply measure the infrared heat emitted from surfaces. They are safe to use around people, equipment, and sensitive materials. The only precaution is to avoid looking directly at very hot objects (like steam pipes) through the camera for extended periods, as it could damage the sensor, but that’s not a safety concern for occupants.
How do I know if a cold spot is moisture or just cold from an air leak?
Use a moisture meter to check the suspect area. If the moisture reading is improved, it’s likely wet. Also look at the shape: air leaks often create a straight-line pattern along gaps, while moisture tends to create irregular or blotchy shapes. If you see a cold spot near a window or door, check for drafts with a smoke pencil first. Thermal bridging also shows as straight, repeating patterns.
What is the importance of the 2°C temperature difference in thermal imaging?
The IEC 62446 standard specifies that a temperature difference of 2°C or more between a suspect area and a comparable reference area warrants further investigation. This threshold helps avoid false positives from minor temperature fluctuations. In usable terms, if a cold spot is less than 2°C cooler than its surroundings, it may not be moisture. Use this as a guide, but always verify with a moisture meter before taking action.
Do I need a special certification to perform thermal surveys for commercial buildings?
While not always required, certification such as ITC Level 1 or 2 in Thermography demonstrates competence. For solar PV inspections, compliance with IEC 62446 is often specified. Many clients, including insurers and local authorities, prefer certified inspectors. At Visual Perspectives, our thermographers hold ITC qualifications and we follow best practices for data collection and reporting. It’s a good idea to check with your insurance provider if they require certification.
How long does a thermal imaging moisture survey take for a typical commercial building?
It varies widely. A small office of 1,000 sq ft might take 2-3 hours including setup and verification. A large multi-storey building or a complex roof could take a full day or more with drone coverage. The key time factor is the thermal preconditioning, letting the building reach stable temperatures can take 12-24 hours. The actual scanning is relatively quick, but thorough interpretation and reporting take longer.

