

Creating a drone roof inspection report that insurers, asset managers, and solar installers actually trust takes more than just flying a camera. You need a repeatable process that captures the right data, analyses it correctly, and documents findings to recognised standards like IEC 62446. This guide walks through each step , from planning a pre-solar survey to compiling a compliance-ready report.
Step 1: Plan Your Drone Roof Inspection – Focus on Commercial Assets and Pre-Solar Surveys
Every good inspection starts on the ground. Before you launch the drone, you need to know what you’re looking for. For commercial roofs that will host a solar PV array, a pre-installation survey is critical. You want to find hidden defects , like under-membrane saturation, ponding water, or insulation gaps , before the panels go up. Once the array is in place, those issues become expensive to fix.
Start by reviewing the building drawings and maintenance history. Note any previous repairs, skylights, roof penetrations, and HVAC equipment that might block the drone’s line of sight. Then do a site walk to identify hazards: overhead cables, antennas, and access restrictions. Check the weather , thermal surveys work best after sunset, when the roof has cooled unevenly and moisture stays warmer than the dry areas. For solar PV inspections under IEC 62446 requirements, you’ll need a sunny day with the system running at least 70% rated output for an hour before the flight.
Define the inspection scope with the client. Will this be a general condition survey, a thermal-only scan for moisture, or a full IEC 62446-compliant solar thermography? Each has different data requirements. Pre-solar surveys should include a membrane integrity check , look for blisters, tears, and standing water. Include the roof build-up details in your plan so the thermographer knows what materials to expect and can set the correct emissivity values.
Step 2: Capture High-Resolution Visual and Thermal Data with a Drone
Now it’s time to fly. Use a drone that can carry both a high-resolution RGB camera and a radiometric thermal sensor. For flat commercial roofs, set the flight altitude between 30 and 50 metres and program a grid path with 70, 80% front and side overlap. That overlap is what makes it possible to stitch images into an accurate orthomosaic later. The drone should fly autonomously , the pilot monitors the live feed and the thermal camera for anomalies in real time.
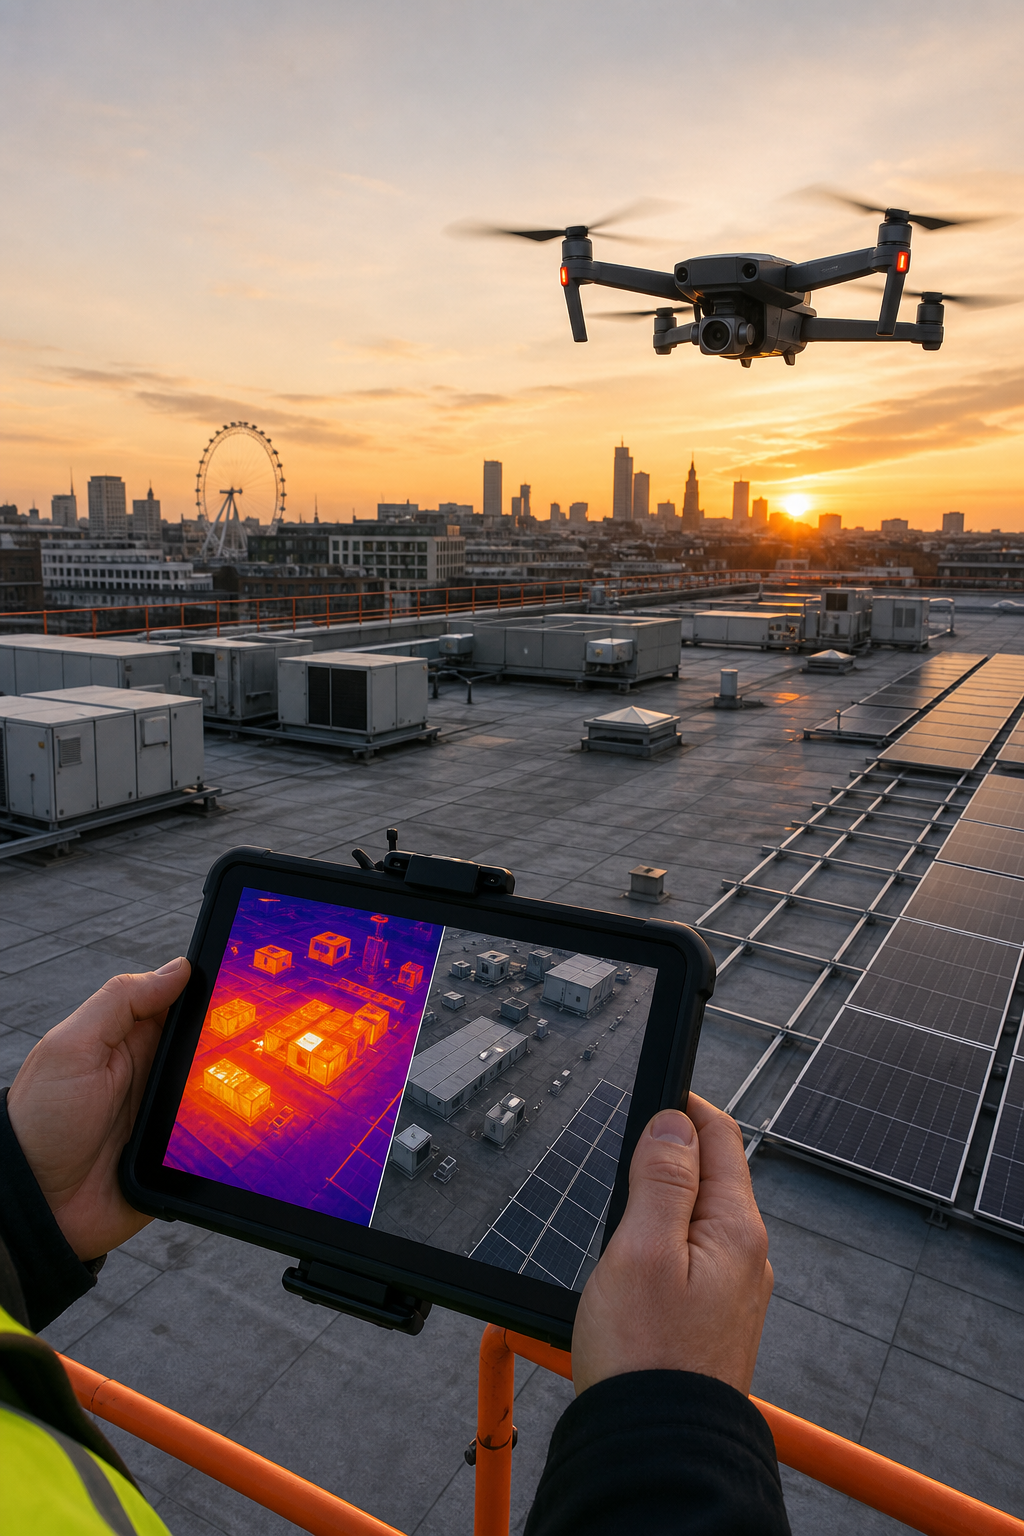
As the drone flies, it captures two types of data simultaneously. The RGB photos document visible defects like cracked membrane, debris, and ponding water. The thermal sensor records surface temperatures , moisture-saturated insulation appears as warm patches after sunset because water retains heat longer than dry material. For solar PV inspections, the drone must fly after the system has been running under load; hot cells or bypass diode failures show up as temperature deltas above 5°C compared to the neighbour panel. Thermal imaging from drones can detect moisture that visual inspection misses entirely.
Land and download the images immediately. Check that every image is sharp and properly exposed. If the thermal sensor was calibrated on a known temperature surface during pre-flight, note the calibration reference. Tag each image with GPS coordinates and flight metadata , this traceability is essential for IEC 62446 reports and insurance documentation.
Step 3: Analyse Thermal and Visual Data to Identify Defects, Heat Loss, and Solar PV Issues
The real detective work happens after the flight. Load the radiometric thermal images into analysis software , FLIR Tools or Thermal Studio work well. Set the temperature range manually to highlight the areas of interest. For flat roofs, look for hot spots that indicate trapped moisture. Interpreting thermal images requires understanding that wet insulation cools more slowly than dry insulation, so it appears warmer. Compare each thermal image to its corresponding visual photo to confirm the surface condition.
For solar PV, use the software to identify panels with a temperature delta greater than 5°C from the average of the string. These are likely heating from faulty cells, bypass diodes, or module mismatch. Record the delta-T, the GPS location, and the visible condition of the panel. Also look for thermal bridging along roof edges and around roof penetrations , heat loss there means insulation gaps or deteriorated materials.
Cross-reference all anomalies with the building’s maintenance records. A hot spot under the membrane might be a known repair area; a new hot spot flags a developing leak. Grade each finding by severity: Priority 1 (immediate risk of failure), Priority 2 (monitor within 6 months), and Priority 3 (observation, no action needed). This grading goes straight into the report.
Step 4: Compile the IEC 62446-Compliant Drone Roof Inspection Report
The report is where raw data becomes an actionable document. For solar PV inspections, it must meet IEC 62446 requirements: include test conditions, a thermal image gallery with paired visual photos, temperature measurements, and a findings matrix. For roof condition surveys, the same structure works , just adapt the defect types.
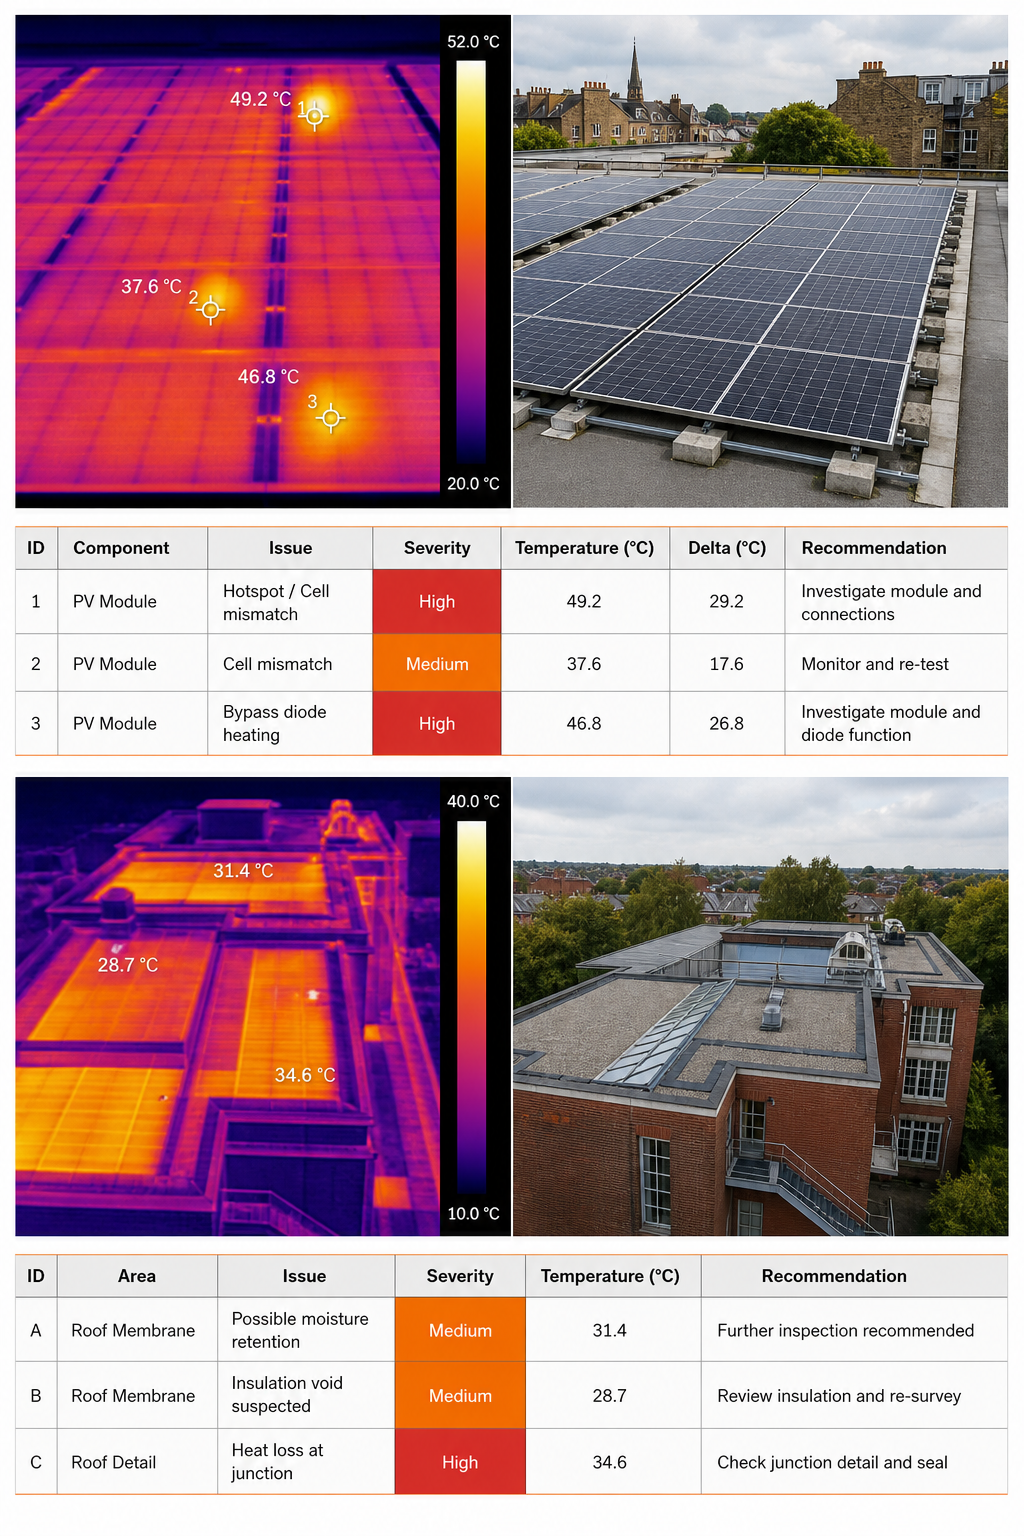
Start with an executive summary that states the inspection date, building address, drone equipment, and the three most critical findings. Then add a site overview with a roof plan or orthomosaic showing the exact location of each defect. Follow with the thermal image gallery , each entry should have the thermal image, the visual photo, the temperature delta, the probable cause, and the severity grade. Visual Perspectives includes recommendations for each finding: repair immediately, monitor, or investigate further. Our reports are signed by ITC-certified thermographers and backed by £5 million insurance.
Include an appendix with raw data files, calibration certificates, flight logs, and the ambient weather conditions at capture time. This shows due diligence if the report is used in a dispute or insurance claim. Format the report as a PDF that can be easily printed or shared. The report must be delivered within 5 working days , speed matters when you’re planning a solar installation or responding to a leak.
Step 5: Interpret and Act on the Inspection Report for Asset Management and Compliance
The report is only valuable if someone reads it and acts. For asset managers, the executive summary and recommendations section should guide decision-making. Priority 1 items , like a saturated roof membrane under a planned solar array , need immediate remediation before any installation begins. Delaying can void warranties and lead to costly structural damage. Using a drone roof inspection helps you prioritise repairs based on real data, not guesswork.
For compliance purposes, save the report as part of the building’s maintenance record. Insurers often require documented evidence that the roof was in good condition before solar panels were installed , the drone report provides that. Schedule follow-up inspections annually or after severe weather to track changes. Many clients use the 3D model from the data to measure defect areas and plan budgets.
Visual Perspectives offers a full interpretation service: we walk through the findings with your team and help you plan the next steps. Our reports are designed to be understood by facilities managers, surveyors, and contractors alike , no confusing jargon.
Frequently Asked Questions
How long does it take to get a drone roof inspection report after the flight?
Most reports are delivered within 5 working days. The actual flight takes 30, 60 minutes, but processing the thermal data, stitching orthomosaics, and writing the analysis takes 2, 3 days depending on roof size.
What is included in an IEC 62446 compliant drone roof inspection report?
A compliant report includes test conditions (solar load, weather), paired thermal and visual images for each anomaly, temperature deltas, GPS coordinates, a findings matrix with severity grades, and recommendations. It also has appendix data like flight logs and calibration certificates.
Can a drone roof inspection report be used for insurance claims?
Yes, many insurance providers accept drone reports as documented evidence of roof condition. The report should include visual photos, thermal images, and a clear description of defects to support a claim for storm damage, fire, or accelerated deterioration.
Why is a pre-solar drone roof inspection important?
A pre-installation survey identifies hidden moisture, membrane damage, and structural issues before solar panels are mounted. Fixing these after installation costs much more and may void the solar warranty. The report provides a baseline for the roof condition, protecting both the building owner and the installer.
What thermal camera specifications do you need for a commercial roof report?
You need a radiometric thermal sensor with at least 320×240 resolution and temperature sensitivity ≤50 mK. Higher resolution (640×480) gives better detail for solar panels. The camera must be calibrated and the images must be radiometric to extract temperature data for the report.
How do you choose a provider for a drone roof inspection report?
Look for CAA-approved pilots, ITC-certified thermographers, and insurance cover of at least £5 million. Ask to , it should have clear thermal/visual pairs, a severity matrix, and recommendations. For solar sites, confirm IEC 62446 compliance.
Conclusion
A strong drone roof inspection report turns aerial data into a decision-making tool. Stick to a repeatable process: plan with the commercial asset in mind, capture high-quality visual and thermal data, analyse methodically, compile to IEC 62446 standards, and act on the findings. Start your next project with a pre-solar survey , it’s the best way to protect your investment.
Ready to put this into practice? Visual Perspectives Limited was built for exactly this.

