
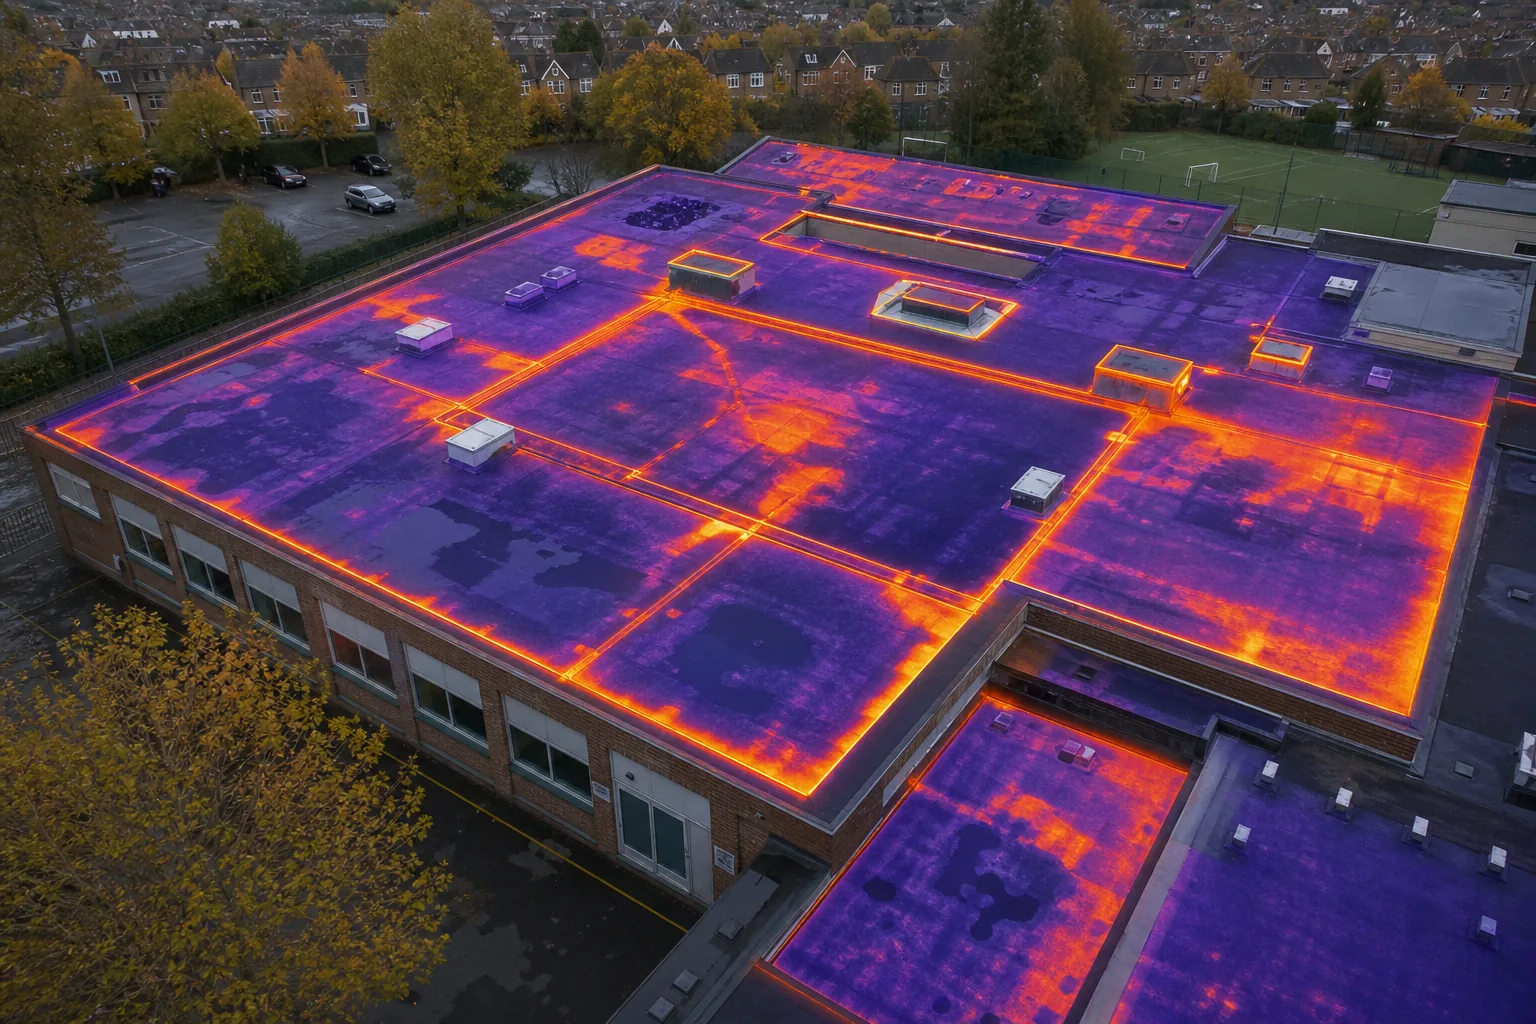
Moisture and heat loss in a building envelope can hide costly defects. If you spot a cold spot or damp patch, you’re likely looking at a deeper performance issue. Below we break down what the terms mean, how they interact, how to read the evidence and a step‑by‑step inspection method that works for large public‑sector estates.
What Moisture and Heat Loss Mean in a Building Envelope
The building envelope is the physical barrier that separates the indoor space from the outside world, walls, roofs, floors, windows and doors all count (Wikipedia). Heat moves through this barrier by three mechanisms: conduction, convection and radiation. Conduction happens when heat travels through solid material; the rate depends on the temperature difference and the material’s thermal conductivity. Convection occurs when air circulates inside cavities, creating loops that ferry heat from warm to cold surfaces. Radiation transfers heat via infrared waves, which can cross air gaps without touching anything.
Moisture follows a similar path. Water vapor diffuses through pores, can condense when it meets a cold surface, and then may be absorbed by porous materials. When moisture gathers, it changes the material’s thermal conductivity, usually raising it so more heat leaks out. This double hit, added heat loss and potential decay, makes moisture a silent driver of energy waste.
In practice, you’ll see a cold bridge where a steel stud or concrete slab conducts heat sharply, and a wet patch where moisture has settled behind insulation. Both show up as temperature differences on a thermal camera, but they tell different stories about the envelope’s health.
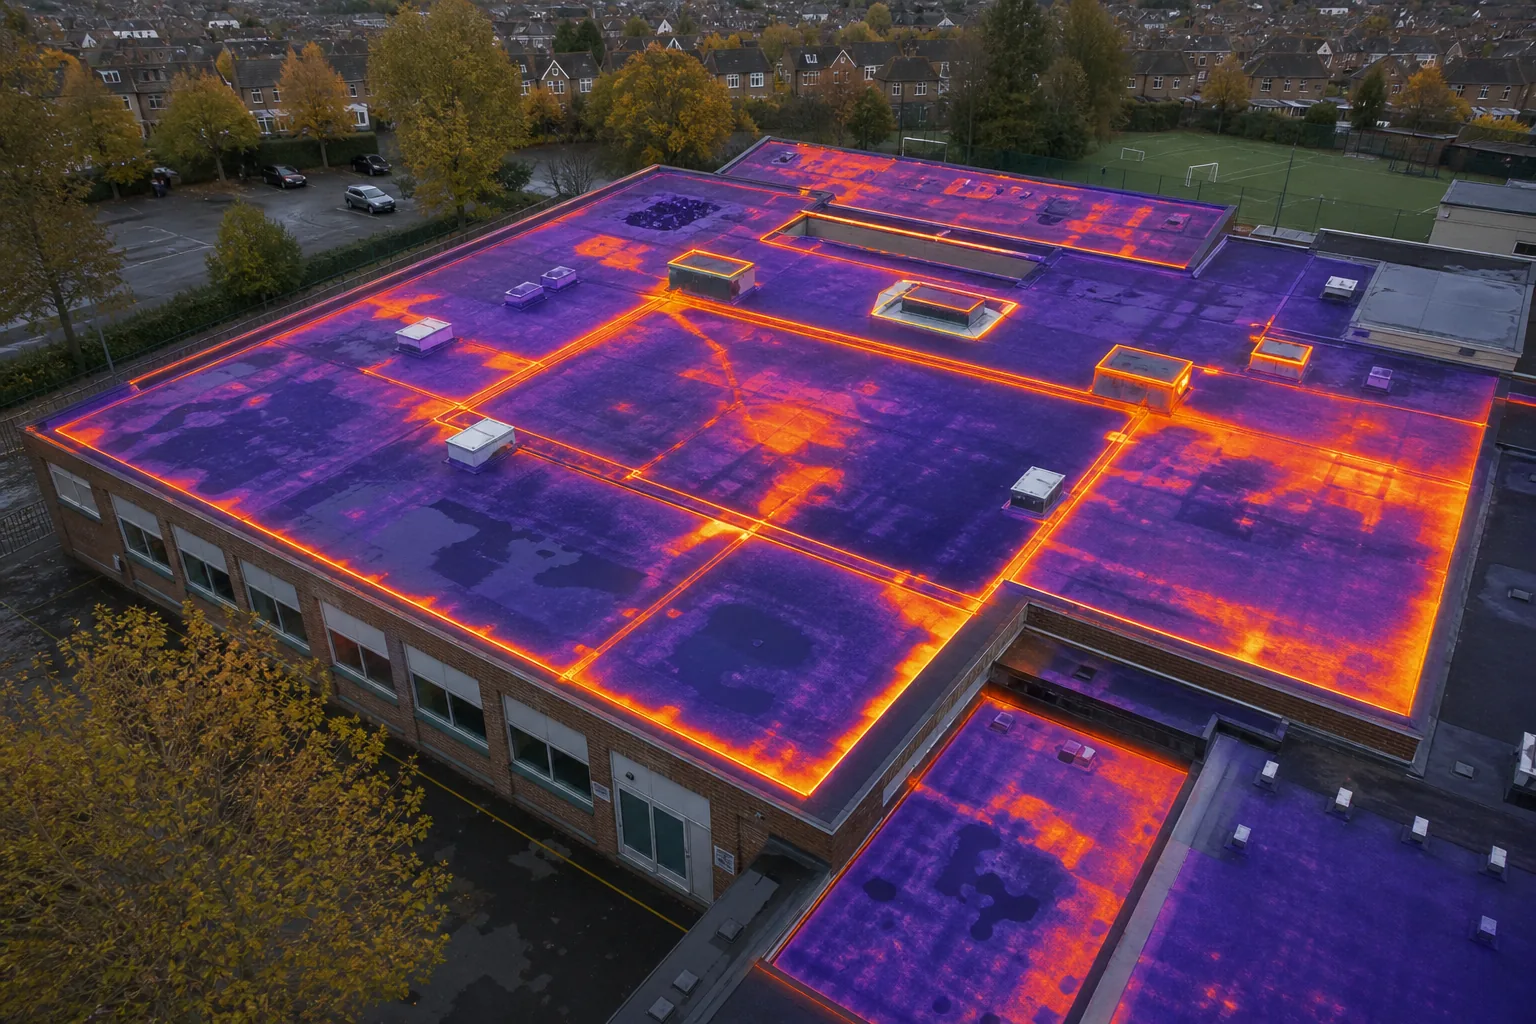
How Moisture Creates or Reveals Heat Loss
When moisture enters a cavity, it reduces the insulation’s effectiveness. Wet insulation conducts heat about ten times faster than dry insulation. The extra conductivity means the interior loses warmth more quickly, which shows up as a colder surface on a thermographic survey.
Moisture also triggers thermal bridges. If a cold pipe runs behind a wall, the pipe’s surface stays below the surrounding temperature. Warm indoor air that contacts the pipe cools, condenses, and can seep into the wall. The resulting damp layer becomes a heat‑loss hotspot that a thermal camera flags as a cold spot.
For asset managers, the usable upshot is simple: a wet area almost always points to a heat‑loss problem. Ignoring the moisture can leave you chasing phantom energy bills while the envelope degrades.
Our own drone surveys capture both moisture signatures and heat‑loss maps in a single flight, letting you see the full picture without separate site visits.
When planning an inspection, start with the Building Envelope Diagnostic Checklist: UK Guide. It walks you through the key zones to target and the data to record.
Reading Thermal Images: What a Cold or Wet Area Does—and Does Not—Prove
Thermal cameras translate surface temperature into colour gradients. A cold spot (often shown in blue) can mean a missing insulation layer, a thermal bridge, or a hidden moisture pocket. A wet area may appear similarly cold because evaporating water draws heat away.
What the image cannot tell you is the exact cause. A blue patch could be a pipe, a structural steel element, or a damp cavity. You need context, building layout, recent works, and weather conditions, to interpret the data correctly.
| Observation | What it proves | What it does NOT prove |
|---|---|---|
| Uniform cold line across a wall | Thermal bridge (e.g., metal stud) | Presence of moisture |
| Irregular cold patch near a window | Potential air leakage or insulation gap | Exact source of leak |
| Localized cold spot with high humidity reading | Moisture accumulation | Whether the moisture is active or historic |
Because thermal data alone can’t confirm material conditions, we pair it with a physical inspection. Our drones provide high‑resolution 3‑D models that let you locate the exact point on the building where the temperature anomaly sits, then a qualified surveyor can investigate on the ground.
For deeper guidance on interpreting winter‑time surveys, see the Building Envelope Diagnostics in Winter guide.
A Usable Inspection Method for Public Sector Estates
Large estates like schools, hospitals and council housing need a repeatable, low‑risk way to spot envelope defects. Our method blends drone‑based thermal imaging, 3‑D mapping and targeted on‑site checks.
Step 1, Planning. We map the entire site in a GIS platform, flagging high‑risk zones such as flat roofs, cavity walls and roof‑wall junctions. Step 2, Flight. Using CAA‑authorised UAVs, we capture radiometric thermal video and visual imagery in a single pass. Step 3, Data Fusion. The thermal layers are over‑laid on a point‑cloud model, giving a geo‑referenced heat‑loss map that points to exact coordinates.
Step 4, Verification. Our surveyors visit the flagged points, use moisture meters and a handheld thermal camera to confirm the drone data, and record the findings in a structured report that meets IEC 62446 standards.
The final report includes a heat‑loss summary, a moisture risk matrix and a 3‑D model you can explore online. It lets facilities managers prioritise repairs, budget accurately and meet PSDS Phase 4 requirements.
Read more about how we blend drone data with traditional surveys in the Building Envelope Testing: A Usable Guide.
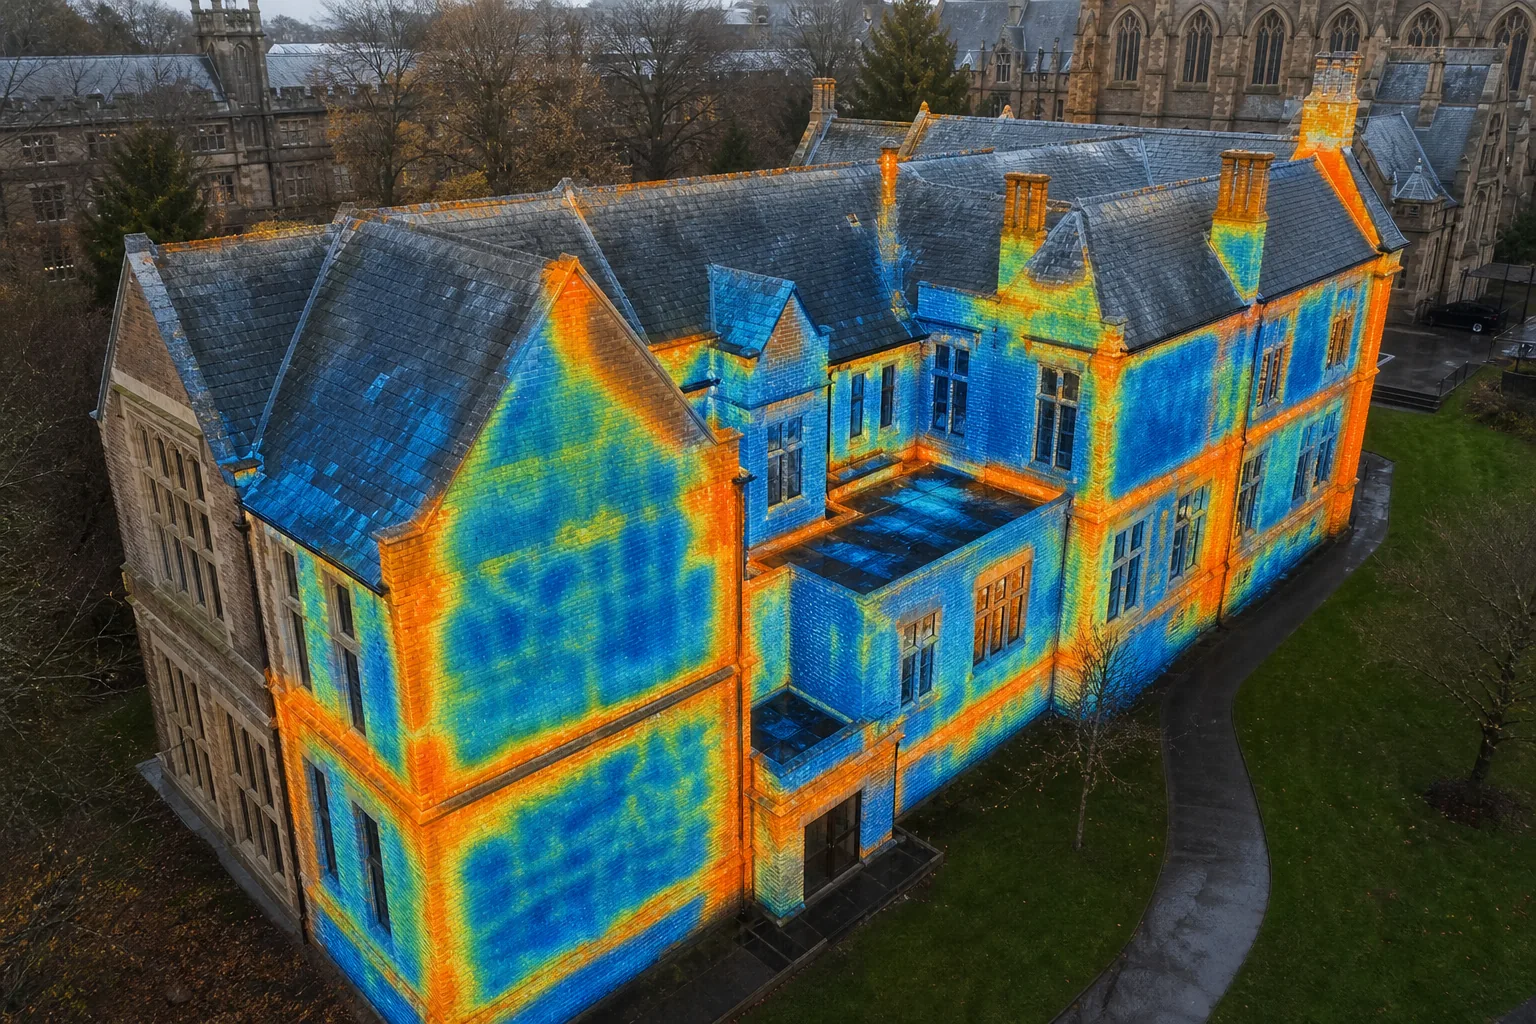
By using this workflow, you reduce on‑site time, avoid scaffolding costs and get evidence that stands up to PAS 2035 and CIBSE guidance.
FAQ: Building Envelope Moisture and Heat Loss
What is building envelope moisture heat loss?
It is the combined effect of water vapor entering the envelope and then increasing the rate at which heat escapes through that wet area. Moisture lowers insulation performance, so a damp spot usually means higher heat loss.
How can I tell if a cold spot is caused by moisture?
Cold spots alone don’t prove moisture. Pair the thermal image with a moisture meter reading or a physical inspection; if the area feels damp or the meter shows high moisture, the cold spot is likely moisture‑related.
Do drones replace all on‑site inspections?
No. Drones give a fast, safe overview and pinpoint problem areas, but they cannot probe behind walls or test material strength. A follow‑up hands‑on check is still required for a full diagnosis.
What standards should a thermal inspection meet?
In the UK, IEC 62446‑3 is the key standard for thermographic surveys of building envelopes. Meeting this standard ensures the data is reliable and acceptable for PSDS funding applications.
A winter thermal survey should be planned with the inspection provider around the requirements of the inspection.
How often should public‑sector estates be surveyed?
Best practice is every three years for a full envelope scan, with targeted checks on high‑risk zones annually. This cadence balances cost with early defect detection.
Independent, evidence‑based inspections help you prioritise spend, meet compliance and move towards net‑zero goals.
We recommend starting with a drone‑based thermal survey from Visual Perspectives Limited and then following the verification steps outlined above. Contact us to schedule your first scan and get a clear picture of where moisture and heat loss are costing your estate money.

