Need a reliable way to check a commercial solar array before it goes live? We’ll walk you through the exact steps to run a full solar panel installation survey, from roof check to a compliant report. Follow the process and you’ll spot hidden faults before they cost you money.
Step 1: Assess the Roof Structure and Site Conditions
Start by verifying that the roof can safely carry the panel load. Look at the construction type , steel deck, timber joists, or flat concrete , and compare it to the design load in the project specs. Measure the span, check for deflection, and note any roof penetrations that could weaken the deck.
Next, record site conditions that affect solar performance. Measure the tilt and azimuth, note shading from nearby objects, and log the roof’s age and any previous repairs. A quick visual walk can reveal corrosion on flashings or cracked membranes that will need remediation before panels are mounted.
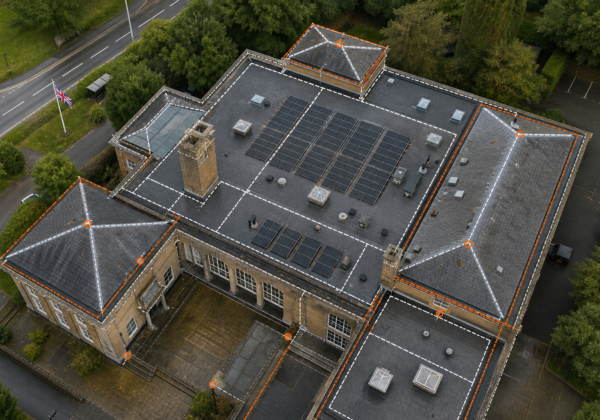
For a deeper look, we often use a drone to capture a high‑resolution 3‑D model. The model lets you see the exact slope and spot uneven areas that a ground survey might miss. Visual Perspectives Limited provides this service as part of a survey package, so you’ll have a digital twin to hand over to the installer.
Remember to check the local wind and snow load codes , relevant building regulations include guidance on roof loading for PV systems. Ignoring these limits can void warranties later on.
When you finish, you should have a clear picture of the roof’s capacity, orientation, and any existing defects that could affect the solar array.
Step 2: Review Existing Documentation and Electrical System
Gather all design drawings, structural calculations, and the original roof warranty. Verify that the structural engineer signed off on the PV load. If the paperwork is missing, request a supplemental calculation before any mounting begins.
Turn to the electrical schematics. Look for the inverter location, string layouts, and grounding details. Check that the conduit sizes meet the current ratings and that there are no splices in the roof‑penetrating cables. A common pitfall is using undersized DC cabling, which can overheat under full sun.
Cross‑reference the documentation with the building’s asset register. If the asset register flags previous roof repairs, note the dates , older repairs may need re‑inspection.
At this stage, we like to review current industry guidance to ensure the survey aligns with national standards. Check for the latest compliance points.
By the end of this step you’ll have a complete file of structural and electrical data, ready for the field work.
Step 3: Conduct a Thermal Imaging Survey of the Roof
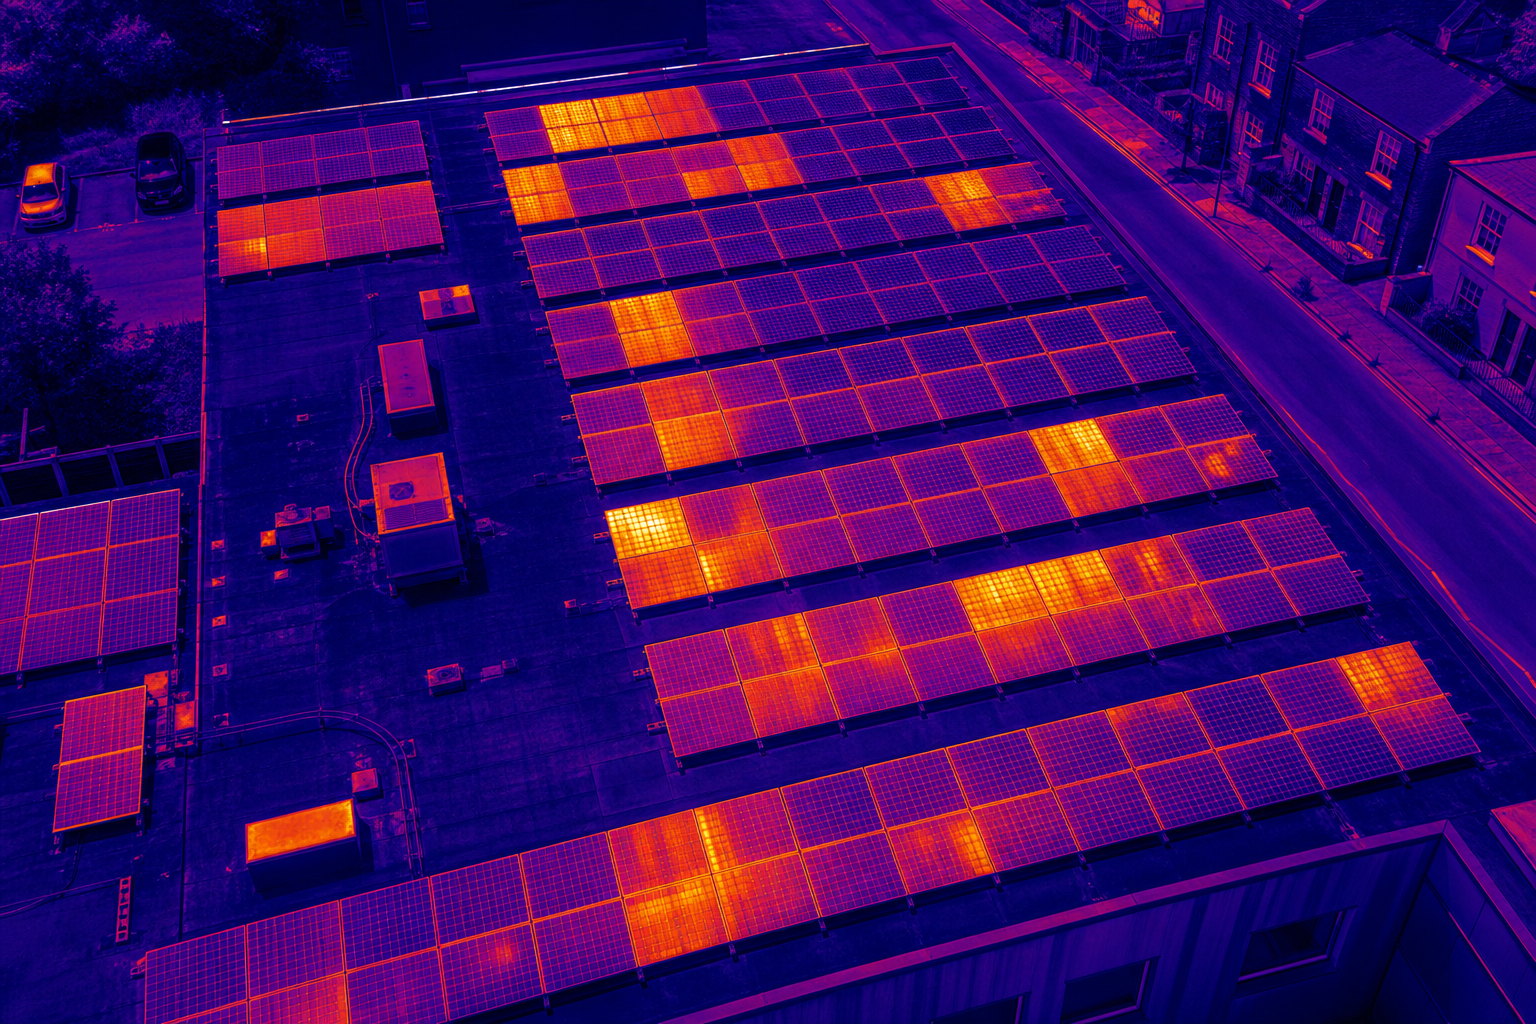
Thermal imaging is the only way to see what the naked eye can’t see. Deploy a drone equipped with a calibrated infrared camera when the solar irradiance is at least 600 W/m² and the wind is under 5 m/s. These conditions match the requirements set out in IEC 62446, the international standard for PV thermography.
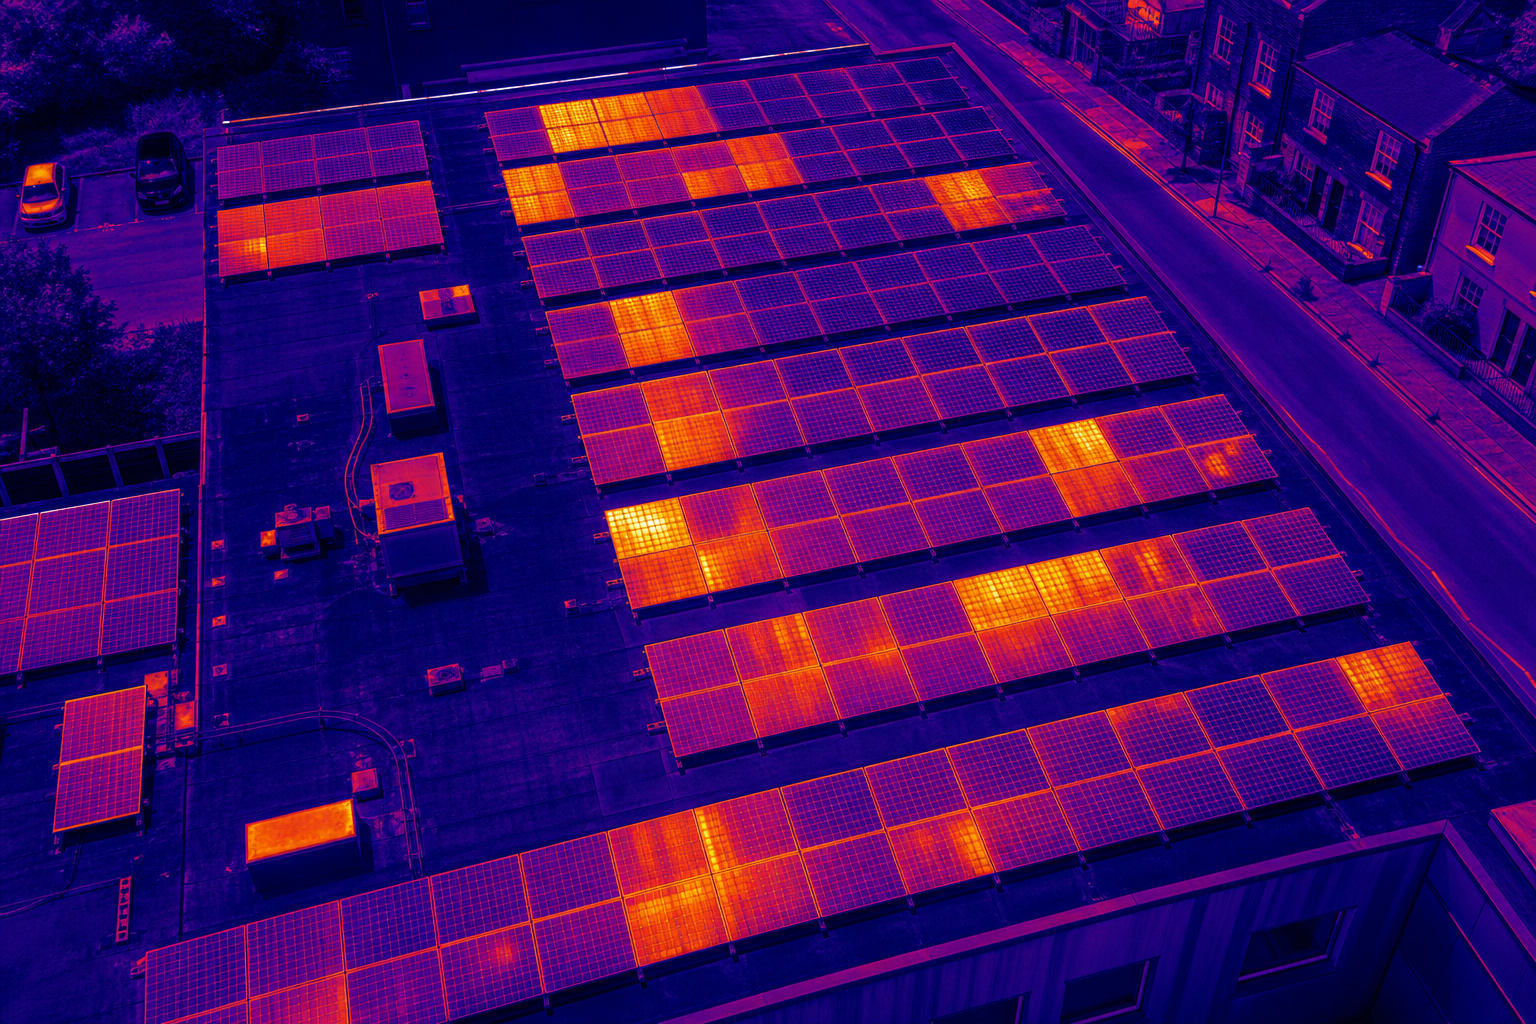
Fly the drone in a grid pattern that gives 80 % overlap between frames. The software stitches the images into a false‑colour heat map. Look for hot‑spots that are more than 5 °C above the surrounding panels , they often indicate faulty cells, bypass diode failures, or poor electrical connections.
Also scan the roof membrane itself. Moisture‑laden insulation shows up as cool patches in the early morning, warning you of hidden leaks that could later corrode mounting brackets.
Once the flight is complete, export both the RGB orthomosaic and the thermal overlay. Visual Perspectives packages these together with GPS tags so you can pinpoint each anomaly on the roof plan.
After processing, you should have a map of all temperature anomalies ready for on‑site verification.
Step 4: Inspect Mounting Systems and Electrical Connections
With the thermal map in hand, walk the roof and verify each flagged location. Check that the mounting rails are securely fastened to the deck and that the brackets are not overtightened , overtightening can crush the membrane and cause water ingress.
Inspect the conduit runs for proper sealing. Any exposed cable should be re‑terminated with weather‑proof glands. Look for signs of corrosion on grounding clamps; a green or white powder indicates oxidation that can lead to fault currents.
At this point we often record a short video walkthrough to capture the physical condition of the mounts. The video provides a visual record that complements the thermal images and helps contractors plan remedial work.
Finish the inspection by confirming that all mounting points meet the manufacturer’s torque specifications. If you find any deviation, note it in the defect log , even a small mis‑alignment can cause long‑term fatigue.
Step 5: Compile the Survey Report with IEC 62446 Compliance
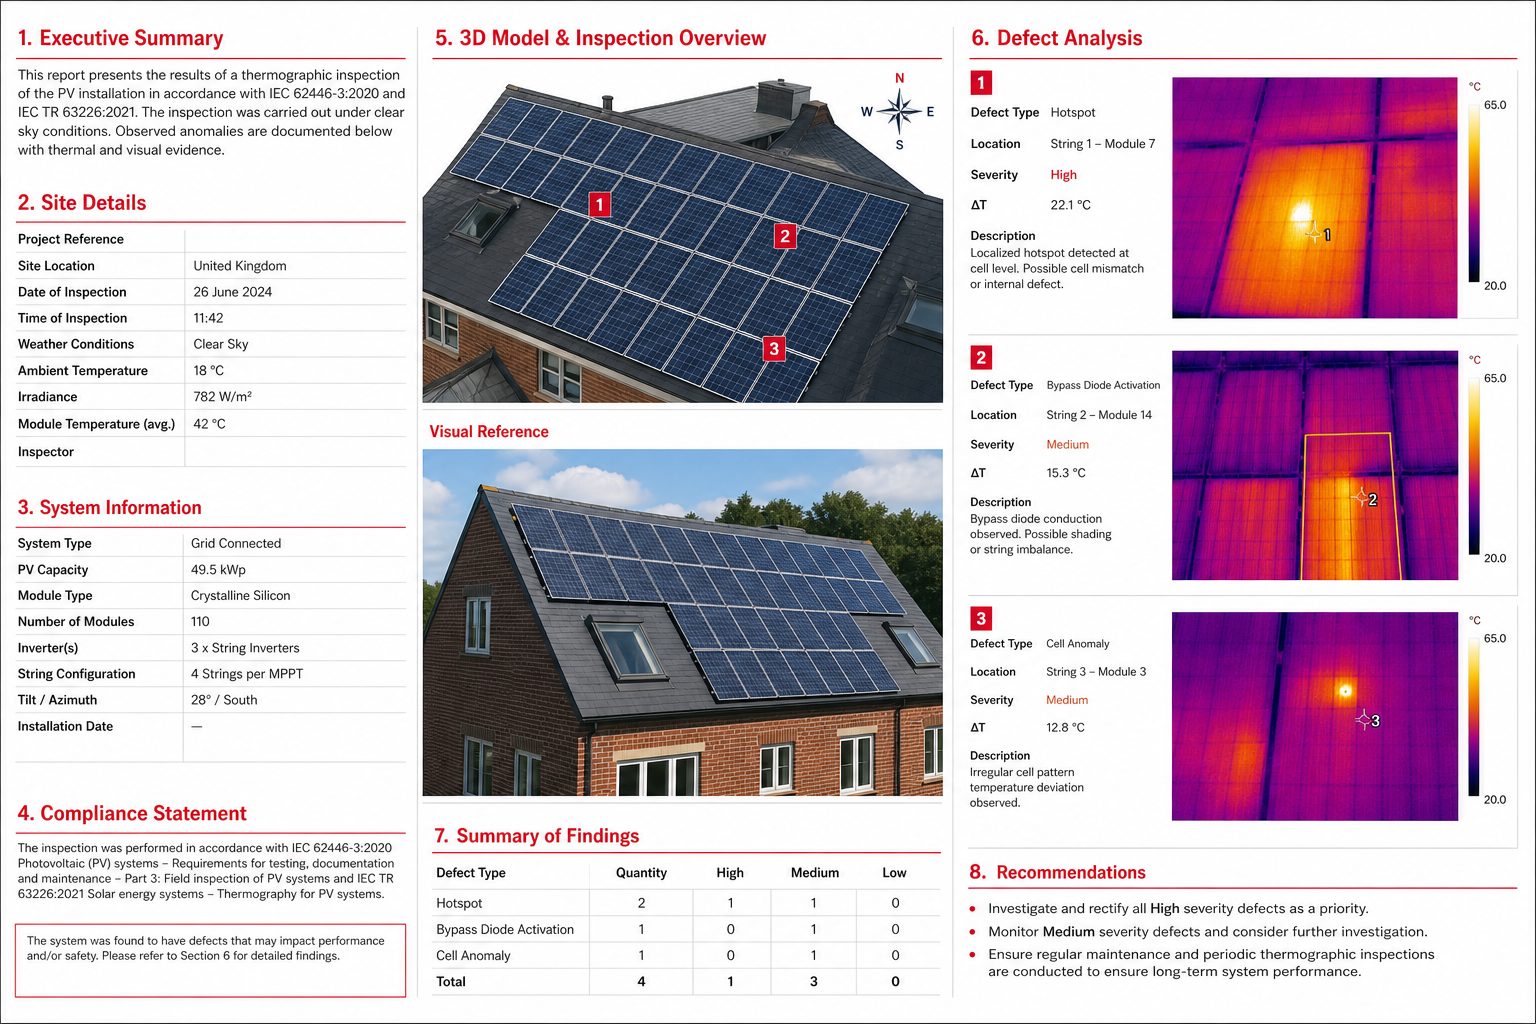
All data , structural notes, electrical schematics, thermal maps, and on‑site photos , feed into a single, IEC 62446‑compliant PDF. The report starts with an executive summary that highlights the most critical issues: safety‑critical hot‑spots, roof moisture zones, and mounting defects.
Next, include a fault matrix that grades each defect by severity (red, orange, yellow, green) and recommends corrective actions. For hot‑spots above 30 °C differential, the recommendation is immediate replacement of the affected module and a review of string connections.
Attach the 3‑D roof model generated by the drone flight. The model lets the installer see exact panel locations and the GPS‑tagged fault points. This level of detail speeds up remedial planning and reduces the need for site visits.
Finally, add a compliance checklist that references IEC 62446‑3 clauses , irradiation level, camera emissivity, and timestamp accuracy. Signing off on this checklist proves to insurers and warranty providers that the survey meets the required standard.
By the time the report is delivered, the project manager should have a clear action list, a digital twin of the roof, and documented compliance that satisfies insurers and warranty bodies.
Frequently Asked Questions
What is the purpose of a solar panel installation survey?
The survey checks roof integrity, electrical safety, and panel performance before the system is commissioned. It helps prevent hidden defects from causing costly downtime later.
Do I need a certified thermographer for the thermal scan?
Yes. IEC 62446 requires the operator to hold a recognized thermography certification, including ITC Level 1 or Level 2, to ensure accurate temperature readings.
How often should I repeat the thermal survey?
Most owners schedule an annual IEC‑compliant thermal inspection. If the site is in a harsh environment , coastal, dusty, or high‑bird‑activity , a six‑month check is advisable.
Can the survey be done on a cloudy day?
Thermal imaging works best under clear skies with solar irradiance above 600 W/m². Cloud cover reduces temperature contrast, making it harder to spot subtle hot‑spots.
What documentation does the final report include?
The report provides a PDF with an executive summary, fault matrix, 3‑D roof model, GPS‑tagged thermal images, and an IEC 62446 compliance checklist.
Is the survey useful for warranty claims?
Absolutely. A compliant report gives insurers and manufacturers concrete evidence that the system was inspected under the right conditions, which is often a prerequisite for warranty coverage.
For more on how to manage solar assets after the survey, explore our Solar Panel Warranty Inspection: A Commercial Guide. It walks you through the next steps to keep your investment protected.
Conclusion
Start with a solid roof assessment, follow with a standards‑based thermal scan, verify mounts, and finish with an IEC 62446‑compliant report. That sequence gives you the confidence to install, operate, and maintain a solar array without surprise failures. Ready to put the plan into action? Read our step‑by‑step inspection guide and book a drone survey today.